Atuin — Supercharge Your Shell History With a Searchable, Timestamped Database
Tired of losing commands in the default CTRL+R maze? Atuin replaces your shell history with a full-featured TUI backed by SQLite — timestamps, context, multi-machine sync, and a clean comparison with FZF-based history search.


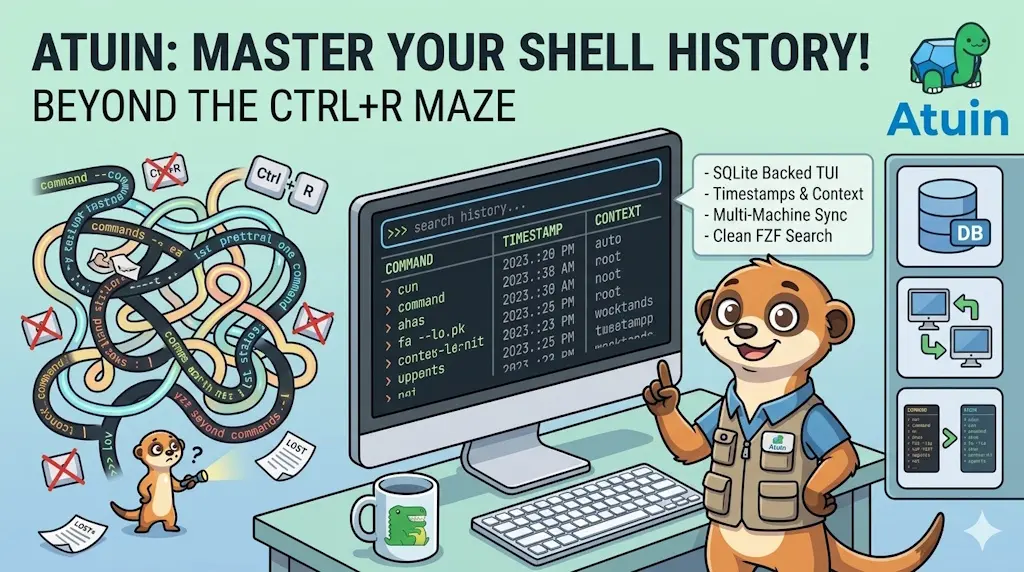
The default shell history is a graveyard for commands you'll never find again — no timestamps, no context, 500 lines and gone. Atuin replaces it with a SQLite-backed TUI that records every command with its exit code, working directory, duration, and timestamp. You get an instant CTRL+R upgrade with filtering by host or folder, without sacrificing your existing history. The second half of this article walks through installation on Bash and ZSH, and wraps with a head-to-head comparison against the classic FZF+history approach.
Damn, it happened again. I typed CTRL+R, searched for that long docker run command I built three weeks ago, and got nothing — or worse, the wrong version from last Tuesday. The default bash history is just... not enough. Five hundred lines, no timestamps, no context about which folder you were in or whether the command even succeeded.
I already wrote about the built-in history tricks — HISTSIZE, HISTTIMEFORMAT, fc, reverse search — and they do help. But they're workarounds, not a solution. You're still searching through a flat text file with no structured data.
Atuin changes the game entirely.
What Is Atuin?
Atuin (the name is a nod to Terry Pratchett's world turtle) is a shell history replacement. Instead of appending commands to ~/.bash_history, it writes every command to a local SQLite database with rich metadata:
- Timestamp — when did you run it?
- Duration — how long did it take?
- Exit code — did it succeed?
- Working directory — where were you?
- Hostname — which machine?
When you press CTRL+R, instead of the tiny reverse-incremental-search prompt, Atuin opens a full-screen TUI where you can type, filter by host or directory, and navigate with arrow keys. It works on Bash, ZSH, Fish, and Nushell. Optional end-to-end encrypted cloud sync lets you share history across machines — but it is entirely opt-in; Atuin works perfectly offline and locally.
No cloud required
Atuin's sync feature is opt-in. If you never run atuin register or atuin login, your history stays 100% local in ~/.local/share/atuin/history.db. This article focuses on the local experience only.
Seeing It in Action with Docker
Already know Atuin, or just want it on your machine? Skip straight to the install — this chapter is only a throwaway container to try it risk-free first.
You know me very well now — I like to containerize things. Before installing anything on your machine, let's spin up a throwaway container so you can feel what Atuin looks like in practice.
Why Docker first?
A Docker container lets you test Atuin without touching your real shell configuration. If you don't like it, you just remove the container. No leftover hooks in your ~/.bashrc.
Two files in a folder — and both are demo scaffolding, nothing else. seed-history.sh especially is no part of using Atuin: its only job is to fabricate a plausible history so that the next screen has something to show. Neither file belongs on your own machine, where installing Atuin is a single brew install away.
Need help here? Click the "Help" button above for setup instructions.
$ docker build -t atuin-demo . [+] Building 28.3s (8/8) FINISHED ✔ exporting to image
$ docker run --rm -it atuin-demo Atuin history seeded with 51 commands. root@4f2a1b3c9d8e:/#
Don't type anything — press CTRL+R straight away:
[atuin] > _
──────────────────────────────────────────────────────────────────────────
1  [exit 0]  1s     12m   ~/projects/blog  docker compose up -d
2  [exit 0]  320ms  15m   ~/projects/blog  git status
3  [exit 1]  90ms   18m   ~/projects/blog  git push origin main
4  [exit 0]  140ms  21m   ~/projects/blog  git pull --rebase
5  [exit 0]  12s    26m   ~/projects/blog  yarn build
6  [exit 0]  760ms  34m   ~/projects/blog  yarn lint
7  [exit 0]  95ms   41m   ~/projects/blog  rg --type md "atuin" .
8  [exit 0]  210ms  47m   ~/projects/blog  fzf --preview 'bat --color=always '
9  [exit 127] 30ms  55m   ~/projects/blog  yarnn start
10  [exit 0]  45ms   58m   ~/projects/blog  yarn start
──────────────────────────────────────────────────────────────────────────
↑/↓ navigate  Enter select  Ctrl+D delete  Esc quit
Exit code, duration, timestamp, and working directory — all in one view. Entry 9 is the kind of thing you only see with Atuin: a typo (yarnn) that died with exit code 127, sitting right next to the corrected command that followed it three minutes later.
Now start typing. Type git and the list narrows to the git commands; type docker and you'll reach commands run in a different project directory, and even on a different machine — the seed data spans two hostnames and three shell sessions, so the CTRL+F filter toggle actually has something to chew on.
That history did not come from nowhere: seed-history.sh writes it straight into Atuin's SQLite database before the shell starts — its header comment explains why, if you are curious. Let's install the real thing first.
Installing Atuin
If you want to keep Atuin permanently on your machine (and you will, after the demo), reach for your package manager. Atuin is in all the usual ones, and that is by far the least exciting way to get it — which is exactly what you want from an install.
Just Use Homebrew
$ brew install atuin
That is the whole thing. Homebrew's atuin formula tracks upstream closely — 18.22.0 as I write this, the same version as the latest GitHub release — and it ships a prebuilt bottle for Linux as well as macOS, so this is equally the right answer inside WSL.
The formula itself is public and reviewed through a pull request, the binary comes from a bottle built by Homebrew's own CI, and brew upgrade atuin will keep it current later — you won't need to come back to this page for that.
Don't have Homebrew yet?
Installing Homebrew itself means a curl piped into bash — I did exactly that in an earlier article, and it is the command brew.sh publishes. No point pretending otherwise.
One thing makes it a better bargain than most: the script lives in the public Homebrew/install repository, so you can pin a revision you have actually read rather than run whatever sits on the branch today.
SHA=8949852f785a3bacaba2a979d0790337950b0a4a
/bin/bash -c "$(curl -fsSL https://raw.githubusercontent.com/Homebrew/install/${SHA}/install.sh)"
On Apple Silicon you can skip all of that: Homebrew ships a signed Homebrew.pkg.
There is no apt package
Atuin is not in the Debian or Ubuntu repositories, so don't go hunting for apt install atuin. If you have a Rust toolchain, cargo install atuin is another honest route: it builds from the published source rather than trusting any prebuilt binary.
On Windows: winget
This blog's usual reader runs WSL, so this one deserves a word of its own. Atuin is in the Windows Package Manager:
PS> winget install -e --id Atuinsh.Atuin
Same shape of guarantee as Homebrew: the manifest lives in the public, pull-request-reviewed microsoft/winget-pkgs repository and pins the installer's SHA-256, so winget refuses anything that doesn't match it.
Windows and WSL are two separate histories
winget installs atuin.exe, the Windows build — it gives you Atuin in PowerShell and CMD, not in your WSL shell. If you live in WSL, the history you actually care about is the one recorded by the Linux binary, installed inside your distribution, with its own database under ~/.local/share/atuin/. Install both if you want both; they are two installations and two unrelated histories.
Without a Package Manager
Download the release binary and verify it
Every release ships a plain binary. Take the musl build: it is statically linked and runs anywhere, while the -gnu one wants a recent glibc and dies with GLIBC_2.39 not found on older distributions.
$ V=18.22.0
$ BASE=https://github.com/atuinsh/atuin/releases/download/v$V
$ curl -fsSLO $BASE/atuin-x86_64-unknown-linux-musl.tar.gz
$ curl -fsSLO $BASE/atuin-x86_64-unknown-linux-musl.tar.gz.sha256
$ sha256sum -c atuin-x86_64-unknown-linux-musl.tar.gz.sha256
atuin-x86_64-unknown-linux-musl.tar.gz: OK
Then put it on your PATH:
$ tar -xzf atuin-x86_64-unknown-linux-musl.tar.gz
$ sudo install -m 755 atuin-x86_64-unknown-linux-musl/atuin /usr/local/bin/atuin
$ atuin --version
atuin 18.22.0
Atuin's releases also carry signed build attestations — cryptographic proof of which workflow built the binary, checkable with gh attestation verify. Good to know it exists; not something you need to get going.
Last Resort: the Official One-Liner
Atuin's documentation leads with a curl piped straight into sh. You will meet it everywhere, so I am not going to pretend it doesn't exist — but you will have to go and get it, and read this first.
This hands your machine to whoever controls that domain
curl … | sh downloads a script and executes it immediately, with your own rights, without you ever seeing a line of it. If setup.atuin.sh is compromised one day — a hijacked domain, a leaked credential, a poisoned CDN entry — then whatever the attacker left there runs on your machine the moment you press Enter. No signature to check, no revision to pin, no diff to read, and no trace afterwards.
The --proto '=https' --tlsv1.2 flags are not the reassurance they look like: they secure the transport, and say nothing whatsoever about the content that arrives.
Use $ curl --proto '=https' --tlsv1.2 -LsSf https://setup.atuin.sh | shbrew install atuin further up, or the verified binary install just above. Reach for this one only on a machine that has neither.I understand the risk — show me the command anyway
Wiring Atuin Into Your Shell
Whichever route you took above, the binary is on your machine but your shell still has no idea it exists — CTRL+R is unchanged for now. Hooking it up is two lines, and they are the two lines worth understanding anyway.
Bash
Add these two lines at the end of your ~/.bashrc:
source /path/to/bash-preexec.sh   # skip if you're on Bash 4.4+
eval "$(atuin init bash)"
bash-preexec on modern Bash
bash-preexec is a small hook library that gives Bash the precmd / preexec mechanism ZSH has natively; Atuin uses it to catch a command before and after it runs, which is how it records the exit code and the duration. On Bash 4.4+ (most recent Linux distros), it is optional. Atuin falls back to a simpler hook. If you want full exit-code and duration tracking, keep bash-preexec. On Ubuntu 24.04 (Bash 5.2), it works fine without it too — but the Docker demo includes it for maximum compatibility.
Then reload your shell:
$ source ~/.bashrc
ZSH
If you are already using ZSH (and you should — here's how to set it up), Atuin integrates even more cleanly because ZSH has native preexec/precmd hooks. No extra dependency needed.
Add to ~/.zshrc:
eval "$(atuin init zsh)"
Then reload:
$ source ~/.zshrc
If you follow a modular ZSH workflow, place the eval line in its own file — e.g., ~/.zsh/plugins/atuin.zsh — and source it from your main ~/.zshrc. This keeps your config clean and easy to toggle.
Import Your Existing History
Atuin imports your current ~/.bash_history or ~/.zsh_history on first launch. You can also trigger it manually:
$ atuin import auto
✓  Importing history from /home/christophe/.bash_history
Imported 4 823 commands
Your old commands are now in the database with their original timestamps (if any). You lose nothing.
Configuring Atuin
Atuin's configuration lives in ~/.config/atuin/config.toml. The defaults are sensible, but a few options are worth knowing:
# How many results to show in the TUI
search_mode = "fuzzy"      # or "prefix", "fulltext"

# Filter by current directory by default (toggle with CTRL+F in the TUI)
filter_mode = "global"     # or "host", "session", "directory"

# Show the full command, not a truncated one
show_preview = true

# Inline TUI instead of full-screen overlay
style = "compact"          # or "full" (default), "auto"
Restart your shell after editing to apply changes.
Atuin vs. FZF History
FZF is the gold standard for fuzzy finding in the terminal — including shell history via CTRL+R when wired up with the fzf-history-widget. So how does Atuin compare?
| Feature | Atuin | FZF + history |
|---|---|---|
| Backend | SQLite database | Flat text file |
| Timestamps | Always recorded | Only if HISTTIMEFORMAT is set |
| Exit code | Yes | No |
| Duration | Yes | No |
| Working directory | Yes | No |
| Multi-machine sync | Yes (opt-in, E2E encrypted) | No |
| Fuzzy search | Yes (built-in) | Yes (via FZF) |
| Filter by directory | Yes (CTRL+F in TUI) | No |
| Filter by host | Yes | No |
| Shell support | Bash, ZSH, Fish, Nu | Bash, ZSH, Fish |
| Dependencies | One binary | FZF binary + shell plugin |
| Import existing history | Yes | N/A (already reads the same file) |
| Configuration | TOML file | Shell variable flags |
| TUI | Full-screen panel | Inline (or full with --height=100%) |
Neither is strictly better — it depends on what you need:
- Use FZF if you already have it wired into your workflow for other things (file finding, git branches, kubectl contexts…) and you only need basic reverse search. The FZF CTRL+R integration is lightweight and requires no daemon or database.
- Use Atuin if you care about why a command ran (exit code, duration, directory) and want history that survives machine migrations and correlates across hosts. The database model makes Atuin's search structurally richer.
They are not mutually exclusive. Some people run both: Atuin for CTRL+R (structured, timestamped search) and FZF for everything else (file navigation, fuzzy completions). Combining FZF with ripgrep for code search remains a different use case that Atuin never touches.
Disable Atuin's CTRL+R to keep FZF's
If you want Atuin to record history silently but keep FZF's CTRL+R binding, add this to your config:
[keys]
scroll_exits = false
And in your shell, bind CTRL+R manually to fzf-history-widget after sourcing Atuin. Atuin will still capture and store commands; it just won't intercept the key.
Conclusion
The default CTRL+R reverse search was designed in an era when 500 commands felt like plenty. It isn't anymore — not when you're juggling Docker builds, git workflows, SSH sessions across half a dozen hosts, and shell functions that took an hour to get right. Atuin gives that history the structure it deserves: a real database, real timestamps, real context.
The Docker demo is the best way to feel the difference without commitment. Spin it up, press CTRL+R, and three weeks of history are already there waiting — you'll immediately see why a flat file isn't enough. If you're already a FZF user, don't think of Atuin as a replacement — think of it as what happens when you apply the "structured data beats plain text" principle to the one tool you use more than any other.
Now, every single time I misremember that perfect tar incantation or forget which directory I was in when that script finally worked, Atuin will remember for me.
Related posts

ai-explain: ELI5 for Scripts and Errors, Right in Your Terminal
November 12, 2026
yq — The YAML Processor You Already Know How to Use
October 19, 2026
hyperfine — Stop Guessing Which Command Is Faster, Measure It
October 12, 2026



git worktree: Work on Two Branches at the Same Time
June 29, 2026