Restore a Joomla backup using Docker
Easily restore your Joomla website backup locally using Docker, Docker Compose, and Akeeba Kickstart. A simple make import command is all it takes.

This article is part of the Create your joomla website using Docker series:
Changelog

This guide explains how to restore a Joomla site locally by combining Docker, an Akeeba Backup archive, and the Akeeba Kickstart utility. Users configure a custom environment with PHP and Apache, then execute a simple import command to deploy the necessary files and containers. The process is completed by accessing the Kickstart wizard in a browser to finalize the database connection and site restoration.
In previous articles (Part 1 and Part 2), we've seen how to create a Joomla site from scratch by using Docker: pull Joomla, PHP, Apache and MySQL from Docker Hub and do magic stuff so we have a fresh http://127.0.0.1:8080 local site.
In this article, we'll see how to restore on our machine, a backup created thanks to great Akeeba Backup component.
We'll reuse some files from Part 2 and make some changes to them.
At the end, we'll have a make import command that will start Akeeba Kickstart.
Result
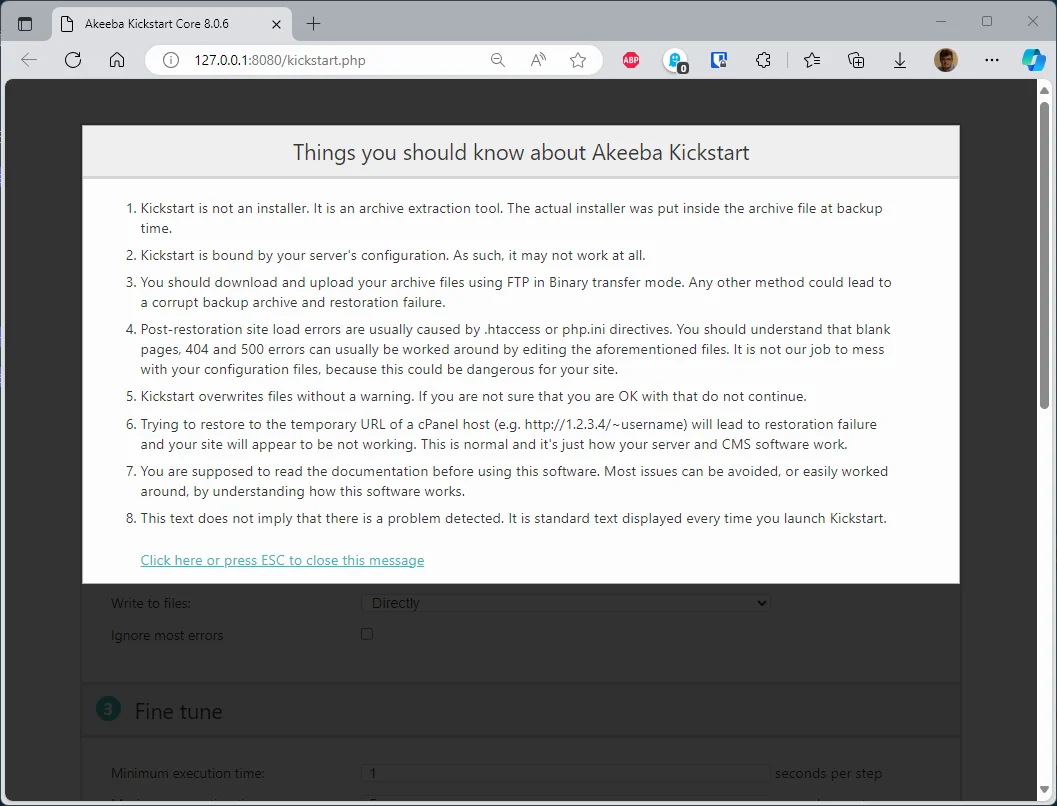
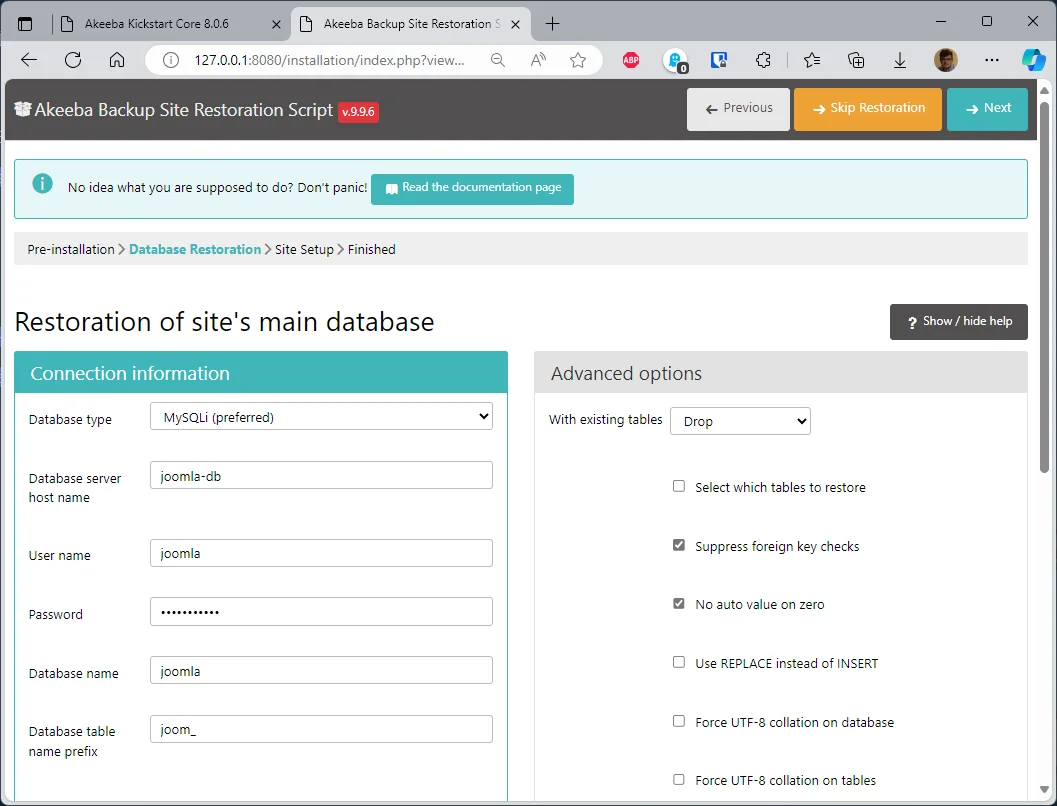
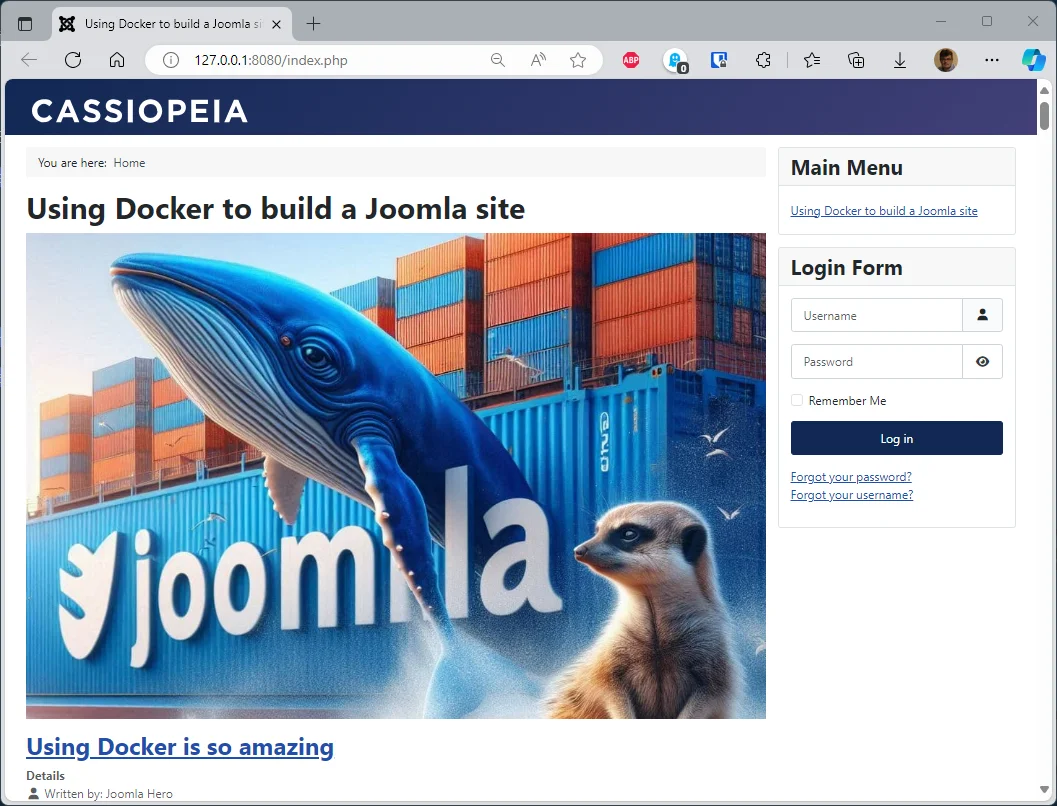
Fill in the database info shown in your console, and Akeeba Kickstart takes care of the rest —
from a raw .jpa backup to a browsable site:
Why it works
- We reuse the same
compose.yaml/.env/makefiletrio from Part 2, so nothing new to learn there. - The only real change: since the backup already is a full Joomla site, the containers only need PHP and Apache, not a fresh Joomla image — the database itself gets rebuilt from the backup by Akeeba Kickstart, not by Joomla's installer.
Creating required files
Skipping the files creation process
In the next chapters, you'll need to create several files using copy/paste. If you wish to go faster, just run the following commands to retrieve files from my Github repo so you don't need to create them.
By following the instructions below, you'll create a xxx folder where you can copy all the files you need to restore a Joomla site using Docker. You can then proceed immediately to the “Run the import process” chapter, as the files are already in place.
If you prefer to understand what you do and create files manually, please continue reading below.
Please create a new folder on your computer like f.i. mkdir /tmp/joomla_restore && cd $_.
In that folder, you'll need to create several files (please refer to Part 2) if you need more explanations about these files.
The orchestration file: compose.yaml
Below, highlighted, small differences from the compose.yaml file we saw in Part 2.
Here is why: this time we don't need to download a fresh copy of Joomla since we already have a Joomla site (our backup). What we need is PHP and Apache. We don't need Joomla, so this time we'll use a custom Docker image, not an already existing one.
Except for the highlighted lines, everything else is the same as in Part 2.
name: ${PROJECT_NAME:-your-project-name}
services: joomla: # highlight-next-line build: # highlight-next-line context: . # highlight-next-line args: # highlight-next-line - PHP_VERSION=${PHP_VERSION:-8.3-apache} container_name: ${CONTAINER_PREFIX:-joomla}-app restart: always ports: - ${WEB_PORT:-8080}:80 environment: - JOOMLA_DB_HOST=joomladb - JOOMLA_DB_NAME=${DB_NAME:-joomla} - JOOMLA_DB_PASSWORD=${DB_PASSWORD:-examplepass} - JOOMLA_DB_USER=${DB_USER:-joomla} depends_on: joomladb: condition: service_healthy user: ${UID:-1000}:${GID:-1000} volumes: - ./joomla_data:/var/www/html networks: - joomla_network
joomladb: image: mysql:${MYSQL_VERSION:-latest} container_name: ${CONTAINER_PREFIX:-joomla}-db restart: always ports: - ${MYSQL_PORT-:3306}:3306 environment: - MYSQL_DATABASE=${DB_NAME:-joomla} - MYSQL_PASSWORD=${DB_PASSWORD:-examplepass} - MYSQL_ROOT_PASSWORD=${DB_ROOT_PASSWORD:-rootpass} - MYSQL_USER=${DB_USER:-joomla} healthcheck: test: ["CMD", "mysqladmin", "ping", "-h", "localhost"] timeout: 20s retries: 10 user: ${UID:-1000}:${GID:-1000} volumes: - ./db_data:/var/lib/mysql networks: - joomla_network
phpmyadmin: image: phpmyadmin container_name: ${CONTAINER_PREFIX:-joomla}-phpmyadmin restart: always depends_on: joomladb: condition: service_healthy ports: - 8081:80 environment: - PMA_HOST=joomladb - PMA_PASSWORD=${DB_ROOT_PASSWORD:-rootpass} networks: - joomla_network
networks: joomla_network:This Docker Compose file defines a three-container setup for running Joomla with a MySQL database and phpMyAdmin management interface. It uses environment variables with sensible defaults to make the deployment configurable—you can override things like the PHP version, database credentials, and port numbers without editing the file itself. All three services run on the same internal network and the Joomla container waits for the database to be healthy before starting.
The .env file
As introduced above, we don't need Joomla anymore, just PHP and Apache. We'll then define a PHP_VERSION variable and initialize it to the desired version.
CONTAINER_PREFIX=joomlaDB_NAME=joomlaDB_PASSWORD=examplepassDB_USER=joomlaMYSQL_PORT=3306MYSQL_VERSION=8.4.2// highlight-next-linePHP_VERSION=8.3-apachePROJECT_NAME=running-joomla-in-dockerWEB_PORT=8080This script sets up configuration variables for a Docker-based Joomla installation. It defines the database credentials, MySQL version, PHP version, port mappings, and project name that will be used when spinning up containers. These variables are typically sourced by other scripts that actually build and run the Docker environment.
Caution
Since we need to restore an existing site, make sure to use the same PHP version as the one used by your site.
Our makefile
We'll need a new action called import:
-include .env
config: @UID=$$(id -u) GID=$$(id -g) docker compose config
down: stop -@UID=$$(id -u) GID=$$(id -g) docker compose down
log: -@UID=$$(id -u) GID=$$(id -g) docker compose logs
reset: down -@rm -rf db_data joomla_data
start: @clear @printf "\033[1;33m%s\033[0m\n\n" "To start your site, please jump to http://127.0.0.1:${WEB_PORT}" @printf "\033[1;33m%s\033[0m\n\n" "Go to http://127.0.0.1:${WEB_PORT}/administrator to open your backend."
@printf "\033[1;104m%s\033[0m\n\n" "Below a summary of your current installation:"
@printf "\033[1;34m%s\033[0m\n\n" "JOOMLA" @printf "\033[1;34m%-30s\033[0m\033[1;104m%s\033[0m\n" " * Project name" "${PROJECT_NAME}" @printf "\033[1;34m%-30s\033[0m\033[1;104m%s\033[0m\n" " * Version" "${JOOMLA_VERSION}" @printf "\033[1;34m%-30s\033[0m\033[1;104m%s\033[0m\n\n" " * Port" "${WEB_PORT}"
@printf "\033[1;34m%s\033[0m\n\n" "DATABASE" @printf "\033[1;34m%-30s\033[0m\033[1;104m%s\033[0m\n" " * Host" "joomla-db" @printf "\033[1;34m%-30s\033[0m\033[1;104m%s\033[0m\n" " * User name" "${DB_USER}" @printf "\033[1;34m%-30s\033[0m\033[1;104m%s\033[0m\n" " * Password" "${DB_PASSWORD}" @printf "\033[1;34m%-30s\033[0m\033[1;104m%s\033[0m\n" " * Database name" "${DB_NAME}" @printf "\033[1;34m%-30s\033[0m\033[1;104m%s\033[0m\n" " * Version" "${MYSQL_VERSION}" @printf "\033[1;34m%-30s\033[0m\033[1;104m%s\033[0m\n\n" " * Port" "${MYSQL_PORT}"
stop: -@UID=$$(id -u) GID=$$(id -g) docker compose stop
up: -@mkdir -p db_data joomla_data @UID=$$(id -u) GID=$$(id -g) docker compose up --detach --build
# highlight-next-lineimport: reset # highlight-next-line -@mkdir -p db_data joomla_data # highlight-next-line
# highlight-next-line @clear # highlight-next-line @printf "\033[1;33m%s\033[0m\n" "Copying Akeeba Kickstart to the Docker Joomla container..." # highlight-next-line @cp en-GB.kickstart.ini ./joomla_data # highlight-next-line @cp kickstart.php ./joomla_data/kickstart.php # highlight-next-line
# highlight-next-line @printf "\033[1;33m%s\033[0m\n\n" "Copying your backup to the Docker Joomla container..." # highlight-next-line @cp backup.jpa ./joomla_data # highlight-next-line
# highlight-next-line @UID=$$(id -u) GID=$$(id -g) docker compose up --detach # highlight-next-line
# highlight-next-line @printf "\n\n\033[1;33m%s\033[0m\n\n" "Please now jump to http://127.0.0.1:${WEB_PORT}/kickstart.php to finalize your site restoration." # highlight-next-line
# highlight-next-line @printf "\033[1;104m%s\033[0m\n\n" "Below a summary of your current installation:" # highlight-next-line
# highlight-next-line @printf "\033[1;34m%s\033[0m\n\n" "JOOMLA" # highlight-next-line @printf "\033[1;34m%-30s\033[0m\033[1;104m%s\033[0m\n\n" " * Port" "${WEB_PORT}" # highlight-next-line
# highlight-next-line @printf "\033[1;34m%s\033[0m\n\n" "DATABASE" # highlight-next-line @printf "\033[1;34m%-30s\033[0m\033[1;104m%s\033[0m\n" " * Host" "joomla-db" # highlight-next-line @printf "\033[1;34m%-30s\033[0m\033[1;104m%s\033[0m\n" " * User name" "${DB_USER}" # highlight-next-line @printf "\033[1;34m%-30s\033[0m\033[1;104m%s\033[0m\n" " * Password" "${DB_PASSWORD}" # highlight-next-line @printf "\033[1;34m%-30s\033[0m\033[1;104m%s\033[0m\n" " * Database name" "${DB_NAME}" # highlight-next-line @printf "\033[1;34m%-30s\033[0m\033[1;104m%s\033[0m\n" " * Version" "${MYSQL_VERSION}" # highlight-next-line @printf "\033[1;34m%-30s\033[0m\033[1;104m%s\033[0m\n\n" " * Port" "${MYSQL_PORT}"This Makefile defines commands to manage a Docker-based Joomla installation with a MySQL database. It provides shortcuts for common operations like starting/stopping containers, viewing logs, resetting data, and importing backups—while automatically passing the current user and group IDs to Docker to avoid permission issues. The file also loads environment variables from a .env file and displays formatted configuration information to the user.
Caution
If you don't know if you already have GNU make, just run which make in the console. If you see make not found then please run sudo apt-get update && sudo apt-get install make to proceed with the installation.
We also need a file called Dockerfile
In the very first lines of the compose.yaml file we've this portion:
name: ${PROJECT_NAME:-your-project-name}
services: joomla: # highlight-next-line build: # highlight-next-line context: . # highlight-next-line args: # highlight-next-line - PHP_VERSION=${PHP_VERSION:-8.3-apache}This is a Docker Compose configuration that defines a service called 'joomla'. It builds a Docker image from the current directory (the context) and passes in a PHP version argument during the build process, with a sensible default of PHP 8.3 with Apache if no version is specified. The project name itself also defaults to 'your-project-name' if not provided.
We don't see here an image: statement but a build: one. This means that we need a special file called Dockerfile.
Please create a new file called Dockerfile in your folder with this content:
ARG PHP_VERSION=8.3-apache
FROM php:${PHP_VERSION:-latest}
RUN set -e -x ; \ docker-php-ext-install mysqli pdo pdo_mysql && docker-php-ext-enable pdo_mysqlThis Dockerfile creates a PHP web server image starting from an official PHP image with Apache. It installs and enables MySQL-related extensions so PHP can connect to and work with MySQL databases.
That file is quite simple right now: it tells us we need a PHP Docker image, and we also need to install the mysqli drivers.
We need a backup for sure
Please also put a backup of your existing site and save it in the same folder. For standardization needs, please call that file backup.jpa.
To make this step more explicit: jump to your existing Joomla website and, using Akeeba Backup, create a backup (file format: .jpa) and download the backup. Please rename the backup file like this: backup.jpa.
And finally, we need Akeeba Kickstart
Finally, we also need to have two files coming from Akeeba Kickstart.
By following the link Akeeba Kickstart, we'll be able to download a .zip file (called kickstart-core-xxx.zip where xxx is a version number). Proceed to the download and open the archives: we'll get two files in it. Please copy these files in your folder.
The two files we need are called en-GB.kickstart.ini and kickstart.php.
Before starting
We're ready. Just before you begin, please check that you have all the required files (please run ls -alh):
Skipping the files creation process
If you've skipped the file creation step earlier by downloading files from my repo, you'll have all the files listed above.
Caution
Remember, for Linux users, we need GNU make to be able to run commands like make import or make up. If you see make not found then please run sudo apt-get update && sudo apt-get install make to proceed with the installation.
Run the importation process
Ok, you've copied a lot of files. Time to start restoring your site.
For Linux users, simply take advantage of GNU Make and run the make import instruction.
For Windows (Powershell or DOS), please run these commands:
For both users (Linux and Windows), you'll get something like this output in the console:
When finished, just start your browser and surf to http://127.0.0.1:8080/kickstart.php to start the restoration of your website using the Akeeba Kickstart wizard — the screens shown at the top of this article.
Once you need to fill in the database information, please refer to what was displayed in your console.
Continue the restoration as you always have; close the window once Akeeba Kickstart asks for it, then click on the Clean Up button; then on Visit your site's frontend and enjoy.
Information
If you've used the provided demo site, the admin account is joomla and its password is joomla@secured.
Conclusion
As we've just seen, restoring a Joomla site locally has become really simple.
All you need to do is retrieve a few configuration files, and just the one named .env should be updated with the PHP and MySQL versions you're using on your production site.
You download the local backup of your site and, with a single command (make import), your site is restored.
No matter what version of Joomla or MySQL you're using.
Piece of cake, no?
This article is part of the Create your joomla website using Docker series:
Loading comments…
Related posts

Create your Joomla website using Docker - Part 2
October 18, 2024
Start Joomla with Docker in just a few clicks
October 3, 2024
Create your Joomla website using Docker - Part 1
December 22, 2023

Update php.ini when using a Docker image
December 22, 2023