Share data between your running Docker container and your computer
Unlock data persistence in Docker! Learn how to use volumes (-v) to effectively share and manage files between your host machine and running containers.

Changelog

This article explains Docker volumes: without -v, everything a container writes stays only in its own memory and disappears when the container is removed (useful for safely running untrusted scripts); adding -v $(pwd):/var/www/html bi-directionally syncs a host folder with a container folder, and adding -u ${UID}:${GID} ensures files created inside the container are owned by you instead of root.
If you don't have Docker yet, please consult my Install Docker and play with PHP post first.
When running Docker without specifying a volume, everything that is done during the execution of Docker is done in memory. In other words: if the PHP script you run from Docker creates folders or files, they will not be created on your disk. They will be created exclusively in memory.
What -v does for you
Start a PHP + Apache container, sharing your current folder with the folder Apache serves:
Now create an index.php file in that folder. On your disk, in your editor, not in the container:
<?php

echo "<h1>Hello world! I'm a shared script</h1>";
This is a simple PHP script that outputs an HTML heading displaying 'Hello world! I'm a shared script'. It's a basic example showing how PHP can generate HTML content to send to a web browser.
Surf to http://127.0.0.1:81/ and the container is already serving it:

No copy, no rebuild, no docker cp. You saved a file and the container saw it.
Why it works
- Without
-v, everything a container writes lives in memory only: remove the container and it's gone. That's the default, and it's a feature (see Under the hood below). - With
-v, the sharing is bi-directional: your editor writes a file, the container sees it; the PHP script writes a file in/var/www/html, it appears on your disk. - The
-uflag decides who owns the files the container creates on your disk. Forget it and you'll get files owned byrootin your own project.
Doing it yourself
For this post, let us create a temporary folder in your /tmp folder: start a Linux console and run mkdir /tmp/docker-volume && cd /tmp/docker-volume, then run the docker run command shown above.
Information
If you're using Windows (MS DOS), replace $(pwd) with %CD% in the instruction above.
Explanation of the arguments used in that command:
--namestep_1_2: for clarity, we use another name,-p 81:80: this time, we'll use port81on our computer and map it to port80on the container,-v $(pwd):/var/www/html: the-vinstruction is used to define a volume. Here, we'll synchronize the container's/var/www/htmlfolder with$(pwd)(or${PWD}in Linux notation), which corresponds to the current folder on our computer.
To create the index.php file, if you have Visual Studio Code on your machine, in the Linux console, run this: cd /tmp/docker-volume && code index.php. This will start VSCode and you will be able to create the script.
The same container, before the file existed
If you surf to http://127.0.0.1:81/ before creating index.php, you get this instead:
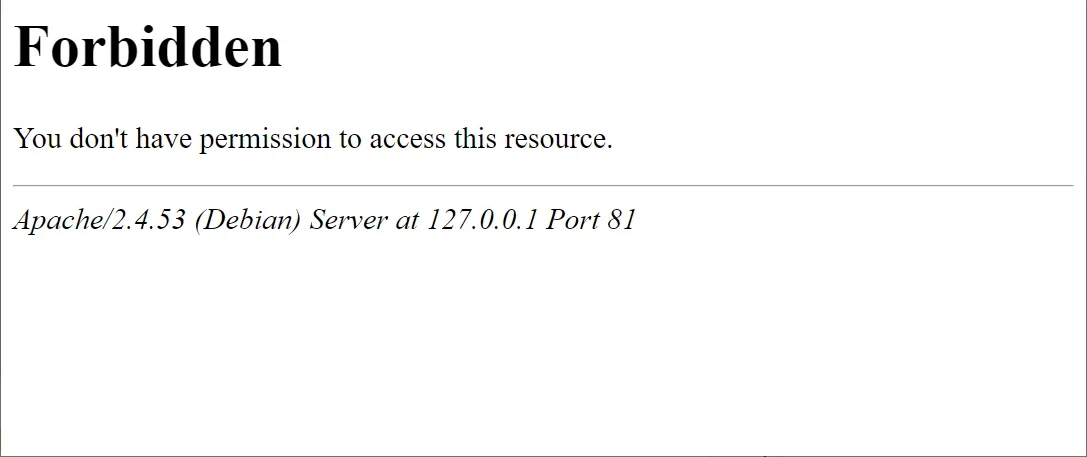
As you probably know, Apache displays by default the content of the /var/www/html folder. And, at that point, we do not have an index.php file in our container so we got the Forbidden page. Same container, same command; the only thing that changed between this screenshot and the previous one is a file you saved on your own disk.
What we've used here is a bind mount: a folder of yours, mounted in the container. Docker also offers managed volumes, which it stores itself somewhere outside your project; Using volumes with Docker, use cases compares both and explains when to prefer one over the other.
Under the hood (skip this if you just want to use it)
Note
Imagine you wish to play with a malicious PHP script. Running the script on your computer is really dangerous since you do not know what the virus will do; where it will create files. But, if you are running the virus script in a Docker container with no attached volume (which is the default) nothing on your computer will be modified. Everything stays in memory (RAM). By removing the Docker container, everything will be removed. This is a great security feature.
Now, the ownership question:
Caution
Files or folders created in the Docker container will be owned by the current user used in the container; which is most often the root user. These files/folders will, then, be created / updated by the root user on your disk as well.
To make sure files/folders created in the container will be owned by you and not root, change the command line like this:
The new flag -u ${UID}:${GID} will reuse your current user id and your current group id and pass this information to Docker. Now, the current user in the Docker container will not be root anymore but a user having your local uid/gid. So, files/folders created in the Docker container will be owned, on your disk, by you.
Conclusion
One flag, -v host_folder:container_folder, and your editor becomes the container's editor. The two things worth remembering three months from now: the sync goes both ways, and -u ${UID}:${GID} is what keeps root from taking ownership of your files.
A bind mount is only one of the two kinds of volume Docker offers. When the data belongs to the container rather than to you (a database, a cache), a managed volume is the right tool: Using volumes with Docker, use cases walks through the three strategies.
Related posts
Preview Your Local Docusaurus Site on Your Phone
November 16, 2026
ai-explain: ELI5 for Scripts and Errors, Right in Your Terminal
November 12, 2026
DuckDB - Query JSON and CSV Files With SQL, No Database Required
November 9, 2026

Docker Build Cache Ate 180 GB — Here's How to Get Them Back
November 2, 2026
Open WebUI — Beyond the Chat: Models, RAG, Tools and API Keys
October 26, 2026