Bring Your CLI Tutorials to Life with a Typewriter Terminal
Add a typewriter animation to your Docusaurus Terminal component — command lines typed character-by-character, output lines appearing in sequence, with a blinking cursor and a click-to-skip escape hatch. Three new props, zero breaking changes.


This article is part of the Creating Docusaurus components series:
- Change how Docusaurus will create img tags
- Overrides the generation of img tags with Docusaurus
- Organize Your Docusaurus Content with a Custom Series Component
- Providing a go to the top button in Docusaurus posts
- Creating a search&replace plugin for Docusaurus
- A component for showing code snippets in a Docusaurus blog
- A Docusaurus component that alerts readers the article is over a year old
- Showing the changelog of your post
- Inject ASCII Art in any HTML pages rendered by Docusaurus
- Best Practice - Customizing the Docusaurus RSS Feed for Full Content & Images
- Running some checks on your Docusaurus images
- Tags management in Docusaurus
- Automating TL;DR Summaries with Gemini AI
- Introducing the ProjectSetup Component - A Standardized Way to Share Project Structures
- How to indicate AI-assisted content in a Docusaurus blog
- Bring Your CLI Tutorials to Life with a Typewriter Terminal
- Meerkat Mischief: Sprinkling Easter Eggs Across my Blog
- AI-Powered Code Tooltips in Docusaurus — Explain Like I'm Five
- Adding Reader Reactions to Your Docusaurus Blog
- Your Blog Is Unreadable to an AI. Here Is the Fix.
- Shake Your Phone, Startle the Meerkat
- Add a "Copy as Markdown" Button to Your Docusaurus Blog
- Ask My Blog: Turning 259 Articles Into 2,160 Searchable Questions
- The Third Door: A Floating Chat Bubble, and the Feature Nobody Could Find
- Drawing a Map of My Own Blog
- Let Readers Flag Issues — A Multi-Type Feedback Widget for Docusaurus
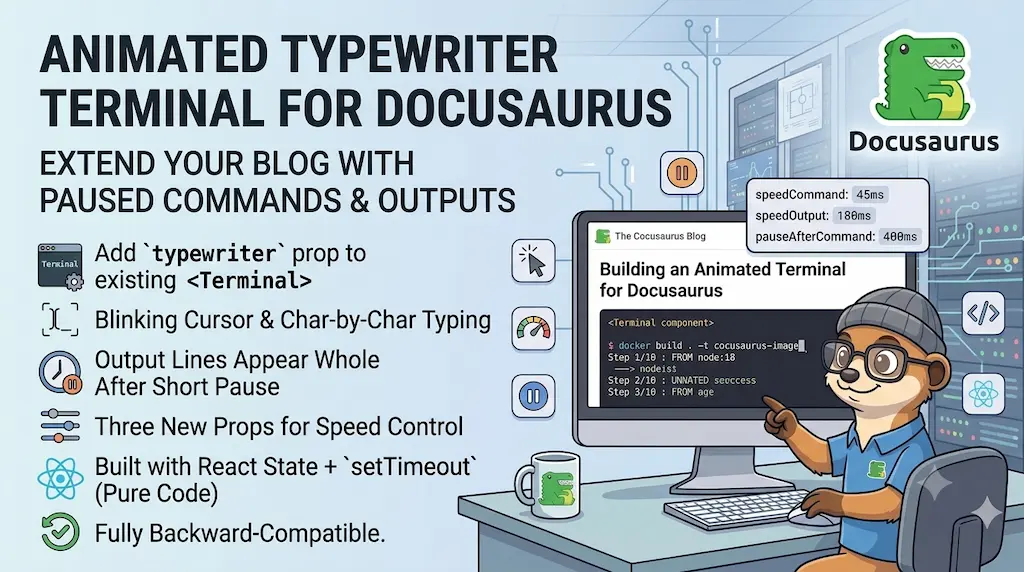
Static code blocks explain what to run. An animated terminal shows it happening. This article extends the existing Terminal component with a typewriter prop: command lines (those starting with $ or #) are typed character-by-character with a blinking cursor; output lines appear whole after a short pause. Three new props control speed and pacing. The change is fully backward-compatible — every existing <Terminal> block stays identical unless you opt in. Implementation is pure React state + setTimeout, no library dependency.
CLI tutorials are dense. A reader follows along, copy-pasting commands, hoping the output they see matches what you wrote. But when the article just shows a static block of text, the sequence of events — the command, the pause, the response — collapses into a single wall of monospace.
A typewriter animation restores that sequence. The command appears letter by letter, as if someone is actually typing it. Then the output follows. The reader's eye is guided through the interaction naturally, without any extra explanation.
If you're a regular reader of my blog, you know that I've developed a component called Terminal that lets me list a series of commands I've run in a Linux-style console—and it looks pretty realistic. It's the console counterpart of the component I use for showing code snippets. Here's an example:
$ docker compose up -d
[+] Running 3/3 ✔ Network myapp_default Created ✔ Container myapp-db-1 Started ✔ Container myapp-web-1 Started
However, it's a little lacking in "life"; let's see how we can make it look pretty cool with a typewriter-style animation.
The Terminal output here above has been obtained using this block in my Markdown content:
<Terminal title="user@machine: ~/project">
$ docker compose up -d

[+] Running 3/3
 ✔ Network myapp_default   Created
 ✔ Container myapp-db-1    Started
 ✔ Container myapp-web-1   Started

</Terminal>
Docusaurus will then do the rendering during the preview of this post or during the HTML generation.
The new typewriter prop
Add typewriter to opt into the animation:
<Terminal typewriter>
$ docker compose up -d

[+] Running 3/3
 ✔ Network myapp_default   Created
 ✔ Container myapp-db-1    Started
 ✔ Container myapp-web-1   Started

</Terminal>
Here is what happens, frame by frame:
$appears, thend, theno, thenc… the command types itself out character by character- A blinking green
▋cursor tracks the current position - Once the command is fully typed, a brief pause lets it settle
[+] Running 3/3appears as a complete line- Each output line follows in sequence
- The cursor disappears when the animation ends
Skip the animation
Click anywhere on the terminal to skip to the end. Useful for readers who have already seen the animation and just want to copy the commands.
Another example:
Animation starts only when visible
A terminal buried at the bottom of a long article would finish its animation before the reader ever reached it. The component solves this with the Intersection Observer API: the typewriter effect starts only when at least 10 % of the terminal enters the viewport. Scroll past it and the animation greets you exactly when you arrive.
Tip
Want to check this? Simply reload this page (CTRL+F5) and just press End to jump to the conclusion of this post. Then, scroll up. Animations will start. Just because the Terminal component is now in the visible part of the page.
Speed scales automatically with line count
Two additional props let you fine-tune pacing, but you rarely need them — the component auto-scales based on the number of lines:
| Lines | typewriterSpeed | typewriterLineDelay | Approx. total duration |
|---|---|---|---|
| ≤ 5 | 40 ms/char | 400 ms/line | ~2 s |
| 6–10 | 25 ms/char | 200 ms/line | ~2.5 s |
| 11–20 | 20 ms/char | 150 ms/line | ~3.5 s |
| > 20 | 12 ms/char | 100 ms/line | ~3.5 s |
A 30-line session completes in roughly the same time as a 3-line one. The animation stays engaging without becoming a waiting game.
Override only when you need a specific feel — a slow, deliberate introduction to a new tool:
<Terminal typewriter typewriterSpeed={60} typewriterLineDelay={600}>
$ fzf --version

0.54.3 (brew)
</Terminal>
How the lines are classified
The animation distinguishes two types of lines by looking at the first non-whitespace characters:
- Command lines — start with
$or#. Typed character-by-character attypewriterSpeedms/char. - Output lines — everything else. Revealed as a complete line after
typewriterLineDelayms. - Blank lines — appear after an 80 ms pause, preserving the visual breathing room of the original content.
This means you don't need to annotate your content in any special way. Write the terminal session naturally; the component infers the structure.
Zero breaking changes
Every existing <Terminal> block in the codebase continues to render exactly as before. The typewriter prop defaults to false, so the static behavior is the default.
If you want to enable the animation everywhere in one step, a global search-and-replace on <Terminal → <Terminal typewriter across the blog/ directory is all it takes:
grep -rl "<Terminal" blog/ | xargs sed -i 's/<Terminal\b/<Terminal typewriter/g'
Implementation sketch
The component holds three pieces of state during animation:
revealedLines  — lines fully shown so far (string[])
lineIdx        — which line is currently being animated (number)
charIdx        — how many characters of that line are visible (number)
A single useEffect drives the animation tick. On each render it decides which timeout to schedule next:
- If the current line is a command and
charIdx < line.length→ schedulesetCharIdx(c => c + 1)aftertypewriterSpeedms - Otherwise (output line, or command fully typed) → schedule the move to the next line after
typewriterLineDelayms
When lineIdx reaches the end of the lines array, animDone is set to true and the component switches back to rendering the original {children} React node — so any syntax highlighting or rich markup in the children is preserved after the animation completes.
The blinking cursor is a single CSS animation:
@keyframes blink {
  0%, 100% { opacity: 1; }
  50%       { opacity: 0; }
}

.cursor {
  display: inline-block;
  color: #00ff00;
  animation: blink 1s step-end infinite;
}
No external library. No canvas. Just state and timers.
Create the component
You'll need to create three new files to your own Docusaurus site. The fourth file is optional and this is the component's documentation:
Need help here? Click the "Help" button above for setup instructions.
Then edit (or create) the src/theme/MDXComponents.js file. If the file already exists, just add the highlighted lines below. If not yet present, create the file with the content below:
// At the top of your file, add this line:

import Terminal from "@site/src/components/Terminal";

// Then in your export section, add this line too:
export default {
  // Reusing the default mapping
  ...MDXComponents,

  // [...]

  Terminal
};
From now one, you can use the <Terminal> component in your posts. Enjoy!
That src/theme/MDXComponents.js file is the central registry of every custom component of your blog; Change how Docusaurus will create img tags shows how it can also override the built-in tags, not just add new ones.
This article is part of the Creating Docusaurus components series:
- Change how Docusaurus will create img tags
- Overrides the generation of img tags with Docusaurus
- Organize Your Docusaurus Content with a Custom Series Component
- Providing a go to the top button in Docusaurus posts
- Creating a search&replace plugin for Docusaurus
- A component for showing code snippets in a Docusaurus blog
- A Docusaurus component that alerts readers the article is over a year old
- Showing the changelog of your post
- Inject ASCII Art in any HTML pages rendered by Docusaurus
- Best Practice - Customizing the Docusaurus RSS Feed for Full Content & Images
- Running some checks on your Docusaurus images
- Tags management in Docusaurus
- Automating TL;DR Summaries with Gemini AI
- Introducing the ProjectSetup Component - A Standardized Way to Share Project Structures
- How to indicate AI-assisted content in a Docusaurus blog
- Bring Your CLI Tutorials to Life with a Typewriter Terminal
- Meerkat Mischief: Sprinkling Easter Eggs Across my Blog
- AI-Powered Code Tooltips in Docusaurus — Explain Like I'm Five
- Adding Reader Reactions to Your Docusaurus Blog
- Your Blog Is Unreadable to an AI. Here Is the Fix.
- Shake Your Phone, Startle the Meerkat
- Add a "Copy as Markdown" Button to Your Docusaurus Blog
- Ask My Blog: Turning 259 Articles Into 2,160 Searchable Questions
- The Third Door: A Floating Chat Bubble, and the Feature Nobody Could Find
- Drawing a Map of My Own Blog
- Let Readers Flag Issues — A Multi-Type Feedback Widget for Docusaurus
Loading comments…
Related posts

Drawing a Map of My Own Blog
October 8, 2026
Ask My Blog: Turning 259 Articles Into 2,160 Searchable Questions
September 28, 2026
Add a "Copy as Markdown" Button to Your Docusaurus Blog
September 10, 2026
Shake Your Phone, Startle the Meerkat
August 27, 2026