Getting a more attractive mindmap with Markmap and Quarto
Generate attractive mindmaps from Markdown using Markmap and customize them in VSCode. Render the final, beautiful HTML result with Quarto and Docker.

This article is over a year old but was reviewed on July 30, 2026 — the content is still accurate.
This article is part of the Diagrams as code series:
- Docker - Diagrams as code
- Build a mind map using Docker and Markdown
- Rendering a JSON file as a mind map
- How to generate a graph from compose.yaml
- Drawdb-app - Render your database model as png, markdown, mermaid, ...
- Python - Generate flows using pydot
- Getting a more attractive mindmap with Markmap and Quarto
- Documentation as Code - Transform Your Infrastructure into Beautiful Diagrams with Python and Mermaid

This article provides a step-by-step guide on how to create attractive, interactive mind maps from simple Markdown files. You'll learn how to use the Markmap VS Code extension to instantly visualize your Markdown lists as mind maps directly within your editor. The post also covers how to customize the appearance of your mind map using VS Code settings. Finally, it demonstrates how to use Quarto, via a simple Docker-based shell script, to render your mind map into a polished, standalone HTML page, without needing to install any tools locally.
In 2023, I wrote this Build a mind map using Docker and Markdown blog post about how to render a Markdown document as a mindmap.
This time, I would like to go one step further and make it more attractive.
Two other ways to turn text into a diagram on this blog: generating Mermaid from a Python script and rendering a JSON file as a mind map.
Here's where we're headed — the same plain Markdown list, rendered as a polished, standalone HTML mindmap with Quarto:
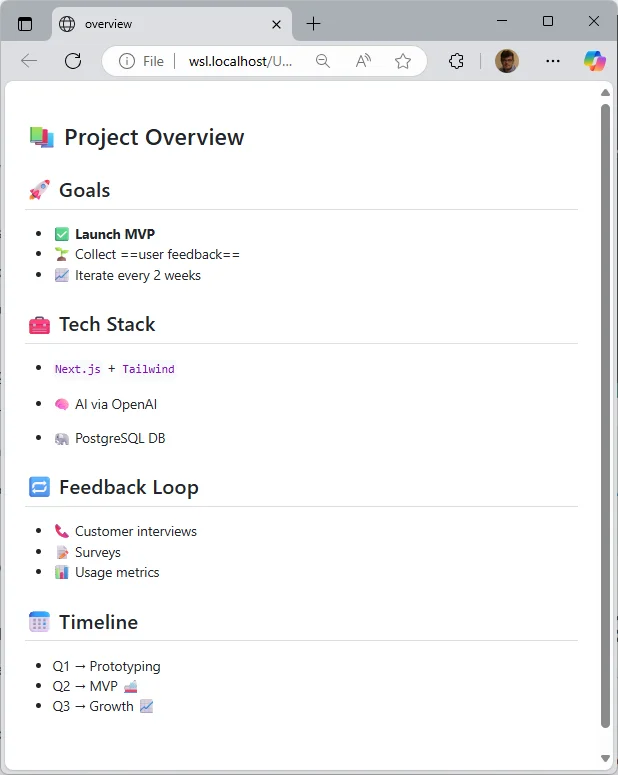
Let's start by the beginning: please start VSCode, create a new file. Because we'll do a little more than this, let's create a new folder: mkdir -p /tmp/markmap && cd $_.
Please create a Markdown file there f.i. overview.qmd. The .qmd extension is just to tell This is a Markdown file and we plan to use it with Quarto; nothing really special here.
# 📚 Project Overview
## 🚀 Goals
- ✅ **Launch MVP**- 🌱 Collect ==user feedback==- 📈 Iterate every 2 weeks
## 🧰 Tech Stack
- `Next.js` + `Tailwind`- 🧠 AI via OpenAI
- 🐘 PostgreSQL DB
## 🔁 Feedback Loop
- 📞 Customer interviews- 📝 Surveys- 📊 Usage metrics
## 📅 Timeline
- Q1 → Prototyping- Q2 → MVP 🚢- Q3 → Growth 📈This is a project planning document that outlines the goals, technology choices, feedback mechanisms, and timeline for launching a software product. The team plans to build an MVP using Next.js and Tailwind with AI capabilities, gather user feedback every two weeks, and scale through Q2 and Q3.
Note
The content of the overview.qmd file here above has been generated by AI.
So, we'll have this:

Render the markmap online
Jump to https://markmap.js.org/repl and paste the Markdown content to immediately get a first rendering:

Ok, it works but not really impressive.
Installing the VSCode extension
There is a Markmap extension on the marketplace; jump to https://marketplace.visualstudio.com/items?itemName=gera2ld.markmap-vscode to install it.
Once installed in VSCode, press CTRL+SHIFT+P to open the Command Palette and then search for Markmap, please select Markmap: open as markmap and press Enter.
You'll get almost the same output as the online version:

Configuring the rendering
By creating a .vscode/settings.json file, you can specify some CSS and default options i.e. by configuring the Markmap-vscode extension.
Please create the .vscode/settings.json file with this content:
{ "markmap.customCSS": ".markmap-link,\nline {\n\tstroke: #505050;\n\tstroke-width: 1.5px;\n}\n.markmap-node > circle {\n\tstroke: #202020;\n\tstroke-width: 1.5px;\n\tr: 6px;\n\tfill: #242424;\n}\n\n.markmap-foreign a {\n\ttext-decoration: none;\n\tcolor: #bbbbbb !important;\n}\n\n.markmap-highlight rect {\n\t/* fill: #303030 !important; */\n\tfill: transparent !important;\n\ttransform: scale(0.84, 0.7) !important;\n\ttransform-origin: center !important;\n\ttransform-box: fill-box;\n\ttransform-origin: center;\n}", "markmap.defaultOptions": "{\n \"color\": \"function(d, i) { return d3.interpolateRainbow(i / 10); }\",\n \"nodeFont\": \"20px 'Segoe UI', 'Helvetica Neue', sans-serif\",\n \"spacingVertical\": 40,\n \"spacingHorizontal\": 140,\n \"initialExpandLevel\": -1,\n \"duration\": 1000,\n \"paddingX\": 10,\n \"paddingY\": 10\n}"}This is a configuration object for Markmap, a tool that visualizes markdown as interactive mind maps. It contains two settings: custom CSS styling that controls the appearance of the map's visual elements (lines, nodes, links, and highlights), and default options that configure how the map behaves and renders (colors, fonts, spacing, and animation duration).
Save the file, go back to the overview.qmd file and if needed, run Markmap: open as markmap again.
The preview will be better:

Read the doc
The list of existing options is documented on the official site: https://markmap.js.org/docs/json-options
Rendering as an HTML page using Quarto
The last step for this article, let's render our Markdown content as a nice HTML page; this by using Quarto.
Let's create a new file: render.sh with the following content:
#!/usr/bin/env bashset -euo pipefail
mkdir -p .build/.quarto_deno_cache_data/denochmod -R 777 .build/.quarto_deno_cache_data
# shellcheck disable=SC2046 # id -u/-g never contain whitespace, safe unquoteddocker run -it --rm \ -u $(id -u):$(id -g) \ -v ".:/public" \ -w /public \ -v "./.build/.quarto_deno_cache_data:/container_cache" \ -e DENO_DIR="/container_cache/deno" \ -e QUARTO_CACHE_DIR="/container_cache/quarto" \ -e HOME="/public" \ ghcr.io/quarto-dev/quarto \ quarto render overview.qmd --no-cache --output-dir .build --quiet
( cd .build && explorer.exe overview.html )This script sets up a Docker container to render a Quarto document (a markdown-based publishing format), making sure the current user's permissions are preserved inside the container and cache files are accessible. It runs the quarto render command on overview.qmd and then opens the resulting HTML file in Windows Explorer.
Please make this file executable by running chmod +x render.sh.
Now, time to call it: in your console, please run ./render.sh to execute the script.
The very first time, it'll be longer because Docker has to download the Quarto Docker image (ghcr.io/quarto-dev/quarto).
The script will call Quarto, do some initializations and convert the overview.qmd file as an HTML page that will be stored in a newly .build folder.
So, after you have fired the script, you'll then have this structure in your project:
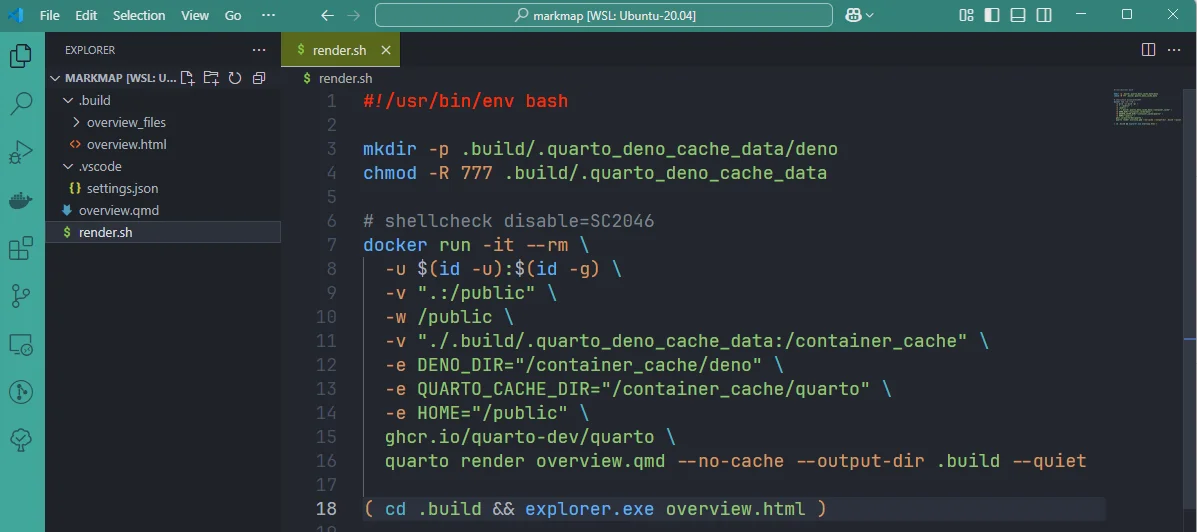
The nice thing is: Quarto has rendered your Markdown content as a beautiful page — the same result already shown at the top of this article, which was the objective of this blog post.
Conclusion
It's very easy to write a MindMap-type structure and generate either an image or a web page. We could go even further with Quarto, because a web page can be customized using CSS.
And, because it's a web page, you can easily copy and paste the rendering into an email, Word document or anything else and get a pretty cool visual for what was originally just a simple list.
This article is part of the Diagrams as code series:
- Docker - Diagrams as code
- Build a mind map using Docker and Markdown
- Rendering a JSON file as a mind map
- How to generate a graph from compose.yaml
- Drawdb-app - Render your database model as png, markdown, mermaid, ...
- Python - Generate flows using pydot
- Getting a more attractive mindmap with Markmap and Quarto
- Documentation as Code - Transform Your Infrastructure into Beautiful Diagrams with Python and Mermaid
Loading comments…