Windows Terminal - Adding a SSH profile
Adding a SSH profile to Windows Terminal to quickly connect to your servers without typing the full SSH command each time.

This article is part of the Windows Terminal series:
- Windows Terminal
- Use a background image in your Windows Terminal console
- Windows Terminal - Split Panes
- Windows Terminal - Adding a SSH profile

This guide demonstrates how to streamline server connections by creating a dedicated SSH profile directly within the Windows Terminal settings. Users simply need to add a new empty profile, configure the command line with their specific SSH instruction, and optionally customize the appearance with icons or background images. This setup enables immediate access to remote servers through the Terminal dropdown menu, eliminating the need to manually type connection commands.
In this article, we'll see how to create a new SSH profile in Windows Terminal so we no longer even need to remember how to connect to the server; we just need to open the profile and that's all.
For illustration purposes, I'll use my hosting server at PlanetHoster, but you can use the same technique for any SSH server you want to connect to.
The Result
Once the profile is created (covered below), connecting to the server is one click from the dropdown menu next to the + button:

Select it, and a new console opens, already connected via SSH.
Why It Works
- No more retyping the
ssh planethostercommand — the profile carries it for you. - The server is reachable straight from the Terminal dropdown menu, alongside your other profiles.
- Fully customizable — an icon, a background image, its own color scheme, whatever helps you spot it at a glance.
Installation
Open Windows Terminal Settings
To open the Windows Terminal settings, you can use the following methods:
- Click on the
+button to open a new tab, then select "Settings" from the dropdown menu. - Press
Ctrl + ,while in Windows Terminal. - Right-click on the title bar and select "Settings".
- Use the command
wt -pin PowerShell or CMD.

Add a profile for any SSH connection
In a recent article, we've seen how to create an SSH profile and be able to run a command like ssh planethoster (or anything else). If you missed it, please read How to connect to your hosting server using SSH.
So, right now, to connect to your hosting server, you only need to run ssh planethoster in a Windows Terminal console (PowerShell, CMD or WSL).
Let's see how to create a Windows Terminal profile that will directly open a console connected to your hosting server:
- Open the Settings of Windows Terminal,
- In the left menu, select "Add a new profile",
- Click on "New empty profile",
- In the "Name" field, type "SSH - PlanetHoster" (or anything else you want),
- In the "Command line" field, type
ssh planethoster(or the alias you defined in your~/.ssh/configfile), - Optionally, choose an icon for your profile by clicking on the "Browse" button or paste here an emoji like "⚡",
- Finally, click on the "Save" button at the bottom right.
The change is immediate: by clicking on the down arrow next to the + button, you'll see your new profile — exactly the result shown at the top of this article.
More Demos
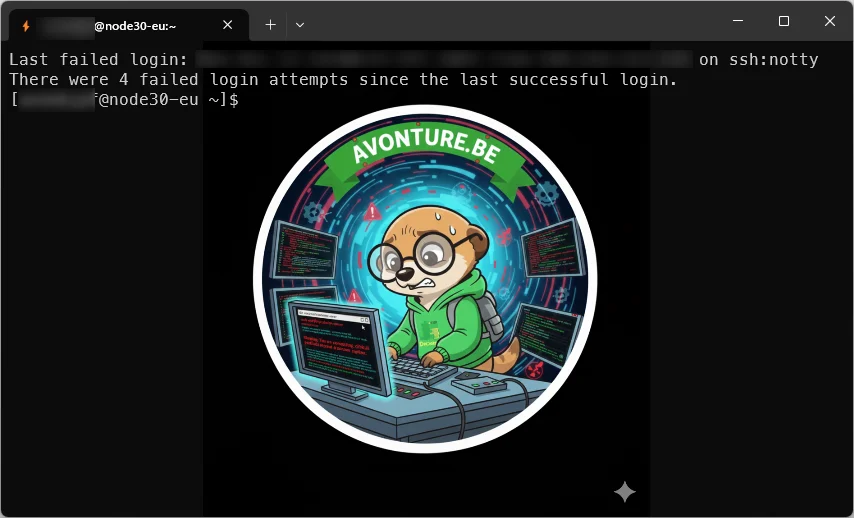
Adding a background image (optional)
Go back to the Settings, select your newly created profile (SSH - PlanetHoster in our example) and scroll down to the "Appearance" section and click on it to expand it.
In the "Background image path" field, click on the "Browse" button and select an image file on your computer (for example a .jpg or a .webp file).
Adjust any other settings you want (for example the "Background image opacity" slider to make the image more or less visible).
Click on the "Save" button at the bottom right.
Conclusion
From now on, whenever you want to connect to your hosting server, just open Windows Terminal and select your SSH profile. A new console will open, automatically connected to your server via SSH.
Close the console to end the session when you're done.
Additionally, pay attention to any other settings you can customize in the profile, such as font size, color scheme, and more, to enhance your experience. You can also define the home directory to open when the profile starts.
Want to go further? Combine this SSH profile with split panes to monitor several remote servers side by side in a single window.
This article is part of the Windows Terminal series:
- Windows Terminal
- Use a background image in your Windows Terminal console
- Windows Terminal - Split Panes
- Windows Terminal - Adding a SSH profile
Loading comments…
Related posts

Windows Terminal - Split Panes
January 12, 2026

Use a background image in your Windows Terminal console
April 24, 2025

Windows Terminal
April 1, 2024