Docker Build Cache Ate 180 GB — Here's How to Get Them Back
Docker's build cache accumulates silently inside WSL2's VHDX virtual disk — and Windows never reclaims that space on its own. Here is the full fix: three common steps, then one compaction method that depends on whether you have local admin rights.


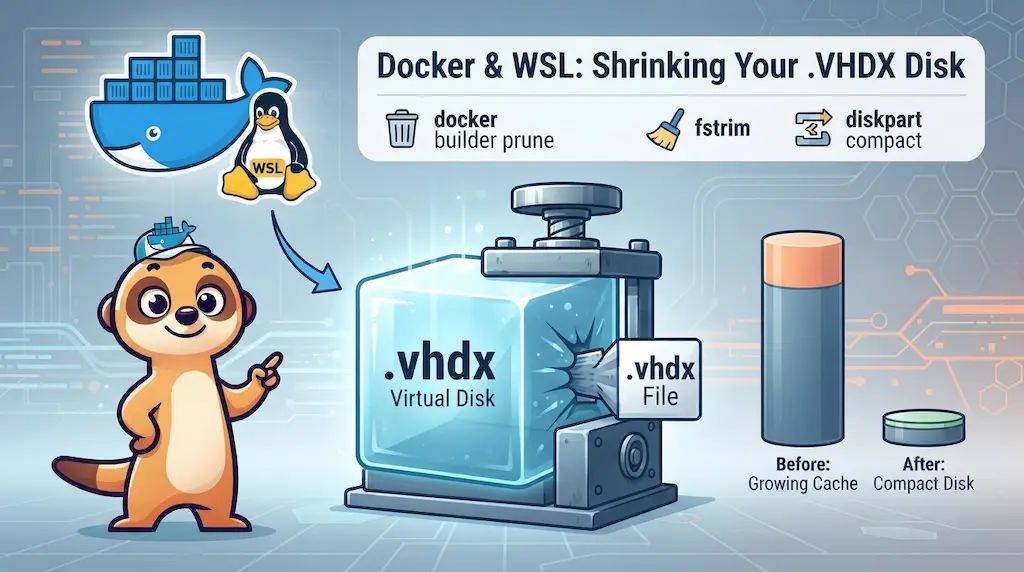
Docker's build cache accumulates inside WSL2's .vhdx virtual disk — and that disk only grows, never shrinks on its own. The fix is three steps anyone can run (prune, trim, shutdown), then one compaction step whose method depends on local admin rights. Without admin, Docker Desktop's Reset to factory defaults creates a fresh .vhdx — no IT ticket needed. With admin, diskpart or Optimize-VHD compact the existing file in place. Either way, sparseVhd=true and a weekly scheduled prune stop the problem from coming back.
Windows is at 2 GB free. Nothing on Windows itself explains it — no large downloads, no recent installs. The culprit is a file that doesn't appear in Explorer's disk usage: docker_data.vhdx, the virtual disk where Docker Desktop stores everything it builds.
docker system df reveals the real situation:
TYPE            TOTAL     ACTIVE    SIZE      RECLAIMABLE
Images          149       15        94.53GB   61.71GB (65%)
Containers      15        2         5.092GB   3.765GB (73%)
Local Volumes   67        41        26.76GB   4.667GB (17%)
Build Cache     2842      0         180.4GB   109.3GB (60%)
2,842 build cache entries, 180 GB, accumulated silently across months of normal Docker use.
Before doing anything, confirm how large the .vhdx file actually is on disk. Open PowerShell and run:
Get-ChildItem "$env:LOCALAPPDATA\Docker\wsl\disk\" -Filter "*.vhdx" |
    Select-Object Name, FullName, @{n='SizeGB';e={[math]::Round($_.Length/1GB,2)}}
Name               FullName                                                                SizeGB
----               --------                                                                ------
docker_data.vhdx   C:\Users\christophe\AppData\Local\Docker\wsl\disk\docker_data.vhdx     288.45
The FullName column gives the exact path you will need in the compaction step. SizeGB is the number to watch — 288 GB here, against an actual Docker content of roughly 90–110 GB.
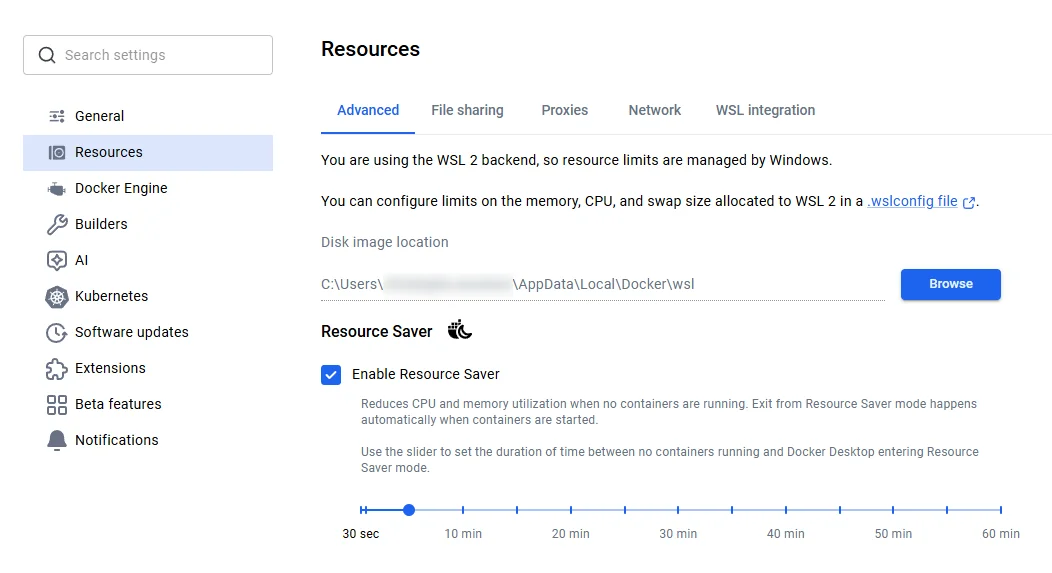
If the disk\ folder is empty, open Docker Desktop → the gear icon → Resources → Advanced: the Disk image location field shows the parent folder; the VHDX sits one level deeper, in the disk subfolder.
After the Fix
Once the cache is pruned and the VHDX compacted, docker system df is clean:
TYPE            TOTAL     ACTIVE    SIZE      RECLAIMABLE
Images          149       15        94.53GB   61.71GB (65%)
Containers      15        2         5.094GB   3.765GB (73%)
Local Volumes   67        41        26.76GB   4.667GB (17%)
Build Cache     0         0         0B        0B
And docker_data.vhdx, which was 288 GB in Windows Explorer, is down to its actual content. Explorer reflects the change immediately after the compaction.
Why Pruning Alone Is Not Enough
Four facts explain the gap between "Docker freed 180 GB" and "Windows still shows 2 GB free":
- WSL2 stores all Docker data in a single
.vhdxfile. Images, containers, volumes, build cache — everything lives insidedocker_data.vhdx. Docker doesn't write toC:\directly. - The VHDX only grows. When Docker adds data, the file gets larger. When Docker deletes data, the blocks are marked free inside the virtual filesystem, but the
.vhdxfile stays the same physical size. docker builder prunefrees blocks; it does not compact the disk. After the prune, 180 GB are available inside the virtual filesystem. Windows still sees the same 288 GB file.fstrimis the bridge. After a prune, the blocks freed inside ext4 are not zeroed — they are just marked unallocated in the filesystem. The.vhdxlayer has no way to know those blocks are empty untilfstrimexplicitly signals it. Withoutfstrim, the compact step finds nothing to remove and the file does not shrink.
Step 1 — Clear the Build Cache
Run docker system df to confirm the Build Cache row is the main offender, then prune it:
docker builder prune -a -f
ID                                              RECLAIMABLE     SIZE            LAST ACCESSED
9v69gh88n3lsd778zxygzi6oj*                      true            11.6MB          2 months ago
ckqqh9pmzysj5bba2598kw58o*                      true            54.49MB         7 weeks ago
mrriwuzhxnbf09fvs6ezamzi6*                      true            15.51MB         2 months ago
[... 2839 more entries ...]
oneg7c4vr96xkpwb28nqgqwa6                       true            435.5MB         Less than a second ago
08or6idagqqm3fi66y48c3aft                       true            104.3MB         Less than a second ago
hq7jnob1j3bnb0n6nylra53a9                       true            113.5MB         Less than a second ago
cilxc42q905svkob16oiapvfd                       true            28.23MB         Less than a second ago
Total:  180.4GB
The -a flag removes all cache entries including ones that could still accelerate a rebuild. The -f flag skips the confirmation prompt.
Images and volumes can also accumulate alongside the cache:
docker image prune -a— removes every image not referenced by a running or stopped container.docker container prune— removes stopped containers. Safe if you use--rmby default.docker volume prune— removes volumes not attached to any container.
Volumes hold data you cannot rebuild
Data inside a named volume cannot be reconstructed from a Dockerfile. If a volume holds a database, uploaded files, or a dev environment's persistent state, docker volume prune deletes it permanently. Run docker volume ls and confirm each volume before pruning.
Run docker system df again to confirm the Build Cache row reads 0B before moving on.
Step 2 — Tell the VHDX Which Blocks Are Free (fstrim)
Docker knows the blocks are free. The .vhdx does not. fstrim punches holes in the virtual disk, signalling which blocks are now empty so the compact step can physically remove them:
docker run --rm --privileged --pid=host alpine nsenter -t 1 -m -- fstrim -av
Run this in PowerShell or Windows Terminal — not inside WSL. It starts a container, enters the Docker Desktop VM's root namespace, and runs fstrim on all mounted filesystems.
/parent-distro/mnt/host/wsl/docker-desktop-bind-mounts/Ubuntu-24.04/a3f7c91b2e8d05f634a8c7d9e1b4f2a8c6d3e5f7a9b1c3d5e7f9a1b3c5d7e9f1: 987.1 GiB (1059882524672 bytes) trimmed on /dev/sdf
/mnt/docker-desktop-disk: 6.1 GiB (6548037632 bytes) trimmed on /dev/sdd
/parent-distro: 48 MiB (50331648 bytes) trimmed on /dev/sde
The trimmed numbers can exceed your disk size — that is normal
A VHDX has a virtual size (what the VM sees, often 1 TB or more) and a physical size (the actual file on Windows, here 288 GB). fstrim -av scans the entire virtual space and reports discards against that logical volume. The actual space returned to Windows is revealed only after the compact step.
Step 3 — Shut Down Docker and WSL
Save any open work in VSCode, then quit Docker Desktop from the systray (right-click → Quit Docker Desktop).
Wait until the Docker Desktop process is completely gone:
Get-Process "Docker Desktop" -ErrorAction SilentlyContinue
Run this until it returns nothing — empty output means the process has exited. Then check WSL:
wsl --list --running
If the list is not empty:
wsl --shutdown
The expected output of wsl --list --running afterwards is There are no running distributions.
Shut down Docker Desktop before wsl --shutdown
Docker Desktop manages several WSL distributions internally. Calling wsl --shutdown while Docker Desktop is still stopping leaves the WSL service in a broken state. The only fix is a full Windows reboot. Always quit Docker Desktop first and wait for Get-Process "Docker Desktop" to return nothing.
Compact the VHDX — Choose Your Path
Steps 1–3 are the same for everyone. The compaction step depends on your rights on the machine.
I hit this problem on my work laptop where I don't have local admin rights. My IT colleague took remote control and ran the diskpart sequence under the admin path. Once he disconnected, I followed the non-admin path to set up the safeguards — so it doesn't repeat.
I Have Local Admin Rights
Docker Desktop and WSL must be fully stopped
Compacting an open VHDX file corrupts it. Verify that wsl --list --running returns There are no running distributions. and that Docker Desktop is not visible in the systray before running anything below.
First check whether the Hyper-V PowerShell module is available on your machine:
Get-Module -ListAvailable Hyper-V
Option A — Optimize-VHD (no diskpart needed)
If the command returned a module entry:
Optimize-VHD -Path "C:\Users\your-name\AppData\Local\Docker\wsl\disk\docker_data.vhdx" -Mode Full
On some corporate machines Optimize-VHD still requires the Hyper-V Administrators group even when the module is present. If it errors with "Access denied", use Option B instead.
Option B — diskpart
Open an elevated PowerShell (right-click → Run as administrator), then type diskpart and run the four commands one at a time:
diskpart
select vdisk file="C:\Users\your-name\AppData\Local\Docker\wsl\disk\docker_data.vhdx"
attach vdisk readonly
compact vdisk
detach vdisk
exit
attach vdisk readonly opens the file read-only — no data is modified. The compact step shows a progress percentage climbing to 100%. Expect anywhere from a few minutes on a fast NVMe to over an hour on a large, slow disk.
Once the compact completes, the .vhdx file shrinks and Explorer reflects the reclaimed gigabytes immediately. Start Docker Desktop and everything works exactly as before.
I Don't Have Local Admin Rights
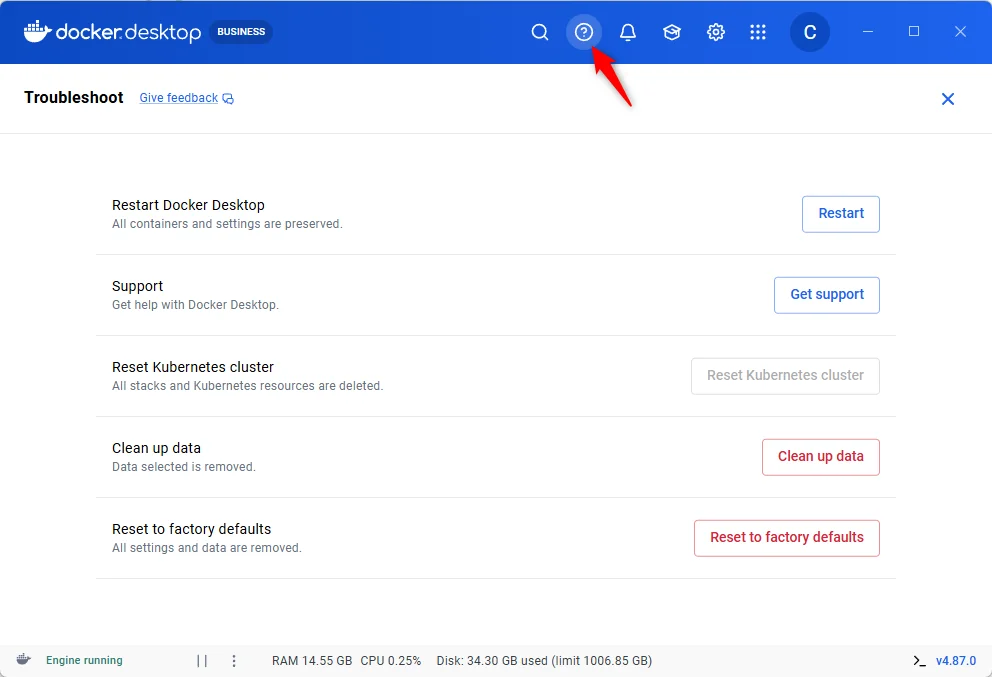
Without local admin, neither diskpart nor Optimize-VHD is available directly. Both paths below start from Docker Desktop's Troubleshoot panel (gear icon → Troubleshoot):
If IT can spare five minutes, send your colleague the four diskpart commands from the admin path above along with the exact .vhdx path from the diagnostic step. The sequence is safe and reversible: attach vdisk readonly opens the file read-only, compact vdisk removes the empty blocks, detach vdisk releases it.
Otherwise, Docker Desktop's Reset to factory defaults deletes docker_data.vhdx and creates a fresh one. With sparseVhd=true already set in .wslconfig (see the Prevention section), the new file will auto-compact as Docker frees space — making this a one-time operation.
The factory reset deletes all local Docker data
Images, containers, and volumes are removed. Everything pulled from a public registry rebuilds with docker compose up. Save named volumes holding important data before proceeding.
Before the reset — save what you cannot rebuild
Named volumes holding important data:
docker volume ls
docker run --rm `
  -v <volume-name>:/data `
  -v C:\docker-backup:/backup `
  alpine tar czf /backup/<volume-name>.tar.gz -C /data .
Images from public registries and stopped containers do not need saving — they rebuild in minutes from their Dockerfiles. The only exception is an image created with docker commit (runtime changes captured without a Dockerfile); if you have one, save it with docker save <image>:<tag> -o backup.tar before proceeding.
Run the reset
Docker Desktop → the gear icon → Troubleshoot → Reset to factory defaults.
After the reset, verify the new .vhdx is sparse:
fsutil sparse queryflag "$env:LOCALAPPDATA\Docker\wsl\disk\docker_data.vhdx"
The expected output is This file is set as sparse. If it still reads NOT set as sparse, sparseVhd=true is not applying to Docker Desktop's data disk on your version — the weekly prune below keeps the file from growing, and a one-time compaction by IT (the admin path) remains available if you ever need the space back.
Restore your saved data
docker load -i "C:\docker-backup\<image>.tar"
docker volume create <volume-name>
docker run --rm `
  -v <volume-name>:/data `
  -v C:\docker-backup:/backup `
  alpine tar xzf /backup/<volume-name>.tar.gz -C /data
Rebuild everything else with docker compose up in each project folder.
Prevention
The fix works, but without action the .vhdx grows back within months. Three layers of defense, from immediate to permanent.
1. Enable sparseVhd
Since WSL 1.3.17 (mid-2024), Microsoft added sparseVhd to .wslconfig:
[experimental]
sparseVhd=true
Edit C:\Users\<your-name>\.wslconfig and add these two lines. A sparse VHDX automatically returns freed blocks to Windows as Docker deletes them — no manual compact needed going forward.
This setting only affects newly-created disks. If your existing docker_data.vhdx is not already sparse (check with fsutil sparse queryflag), it has no effect on it. Leave the setting in .wslconfig anyway: after a factory reset or a new WSL distribution, the new disk benefits from it automatically.
2. Daily size check in your terminal
Add this function to your .bashrc or .zshrc — it displays a one-line warning on your first terminal open of the day when the .vhdx exceeds 150 GB:
_docker_size_check() { local stamp="$HOME/.cache/.vhdx_check_$(date +%Y%m%d)" [[ -f "$stamp" ]] && return touch "$stamp" local app_data app_data="$(powershell.exe -NoProfile -Command \ '[System.Environment]::GetFolderPath("LocalApplicationData")' \ 2>/dev/null | tr -d '\r\n')" local vhdx vhdx="$(wslpath "${app_data}/Docker/wsl/disk/docker_data.vhdx" 2>/dev/null)" [[ -f "$vhdx" ]] || return local gb gb="$(du -BG -- "$vhdx" 2>/dev/null | cut -f1 | tr -d 'G')" (( gb > 150 )) && printf '\n⚠ docker_data.vhdx: %s GB — run: docker system df\n\n' "$gb"}_docker_size_checkThis function checks once per day if Docker's virtual disk file has grown over 150 GB, and if so, prints a warning message. It uses a timestamp file to avoid checking repeatedly on the same day, then retrieves the disk file size through Windows PowerShell and displays an alert if needed.
The date-stamped flag file in ~/.cache/ ensures the check runs at most once per day. Adjust the 150 threshold to match your disk situation.
3. Weekly automatic prune via Windows Task Scheduler
Windows Task Scheduler can run docker builder prune automatically — a user-level task does not require admin rights. Open PowerShell as your normal user:
$action = New-ScheduledTaskAction `
    -Execute "powershell.exe" `
    -Argument '-NoProfile -NonInteractive -Command "wsl -e docker builder prune -a -f --filter ''until=168h''"'
$trigger = New-ScheduledTaskTrigger -Weekly -DaysOfWeek Monday -At "08:00"
Register-ScheduledTask -TaskName "Docker-Weekly-Prune" -Action $action -Trigger $trigger
wsl -e docker runs the docker CLI inside your default WSL distribution, so that distribution must have Docker Desktop's WSL integration enabled (gear icon → Resources → WSL integration); otherwise the task fails without any visible error.
The --filter "until=168h" flag keeps cache entries younger than one week, preserving rebuild speed for active projects while removing everything older.
Verify and manage the task
Confirm the task was registered:
Get-ScheduledTask -TaskName "Docker-Weekly-Prune"
Expected output: State: Ready. Then inspect the trigger and action:
$task = Get-ScheduledTask -TaskName "Docker-Weekly-Prune"
$task.Triggers
$task.Actions
Run it immediately to test:
Start-ScheduledTask -TaskName "Docker-Weekly-Prune"
Wait 10–15 seconds for WSL to start and Docker to respond, then check the result:
Get-ScheduledTask -TaskName "Docker-Weekly-Prune" | Get-ScheduledTaskInfo |
    Select-Object LastRunTime, LastTaskResult, NextRunTime
LastTaskResult: 0 means success. The value 267011 (SCHED_S_TASK_NOT_SCHEDULED) is the Windows default before a task has ever run — it is not an error.
The task may prune nothing on first run
--filter "until=168h" protects everything created or used in the last 7 days. On an active machine where you build regularly, most cache entries fall within that window and the task exits cleanly without removing anything. That is the intended behaviour: it prevents long-term accumulation without breaking incremental rebuilds. docker system df shows the reclaimable space for images and volumes separately — those are not touched by this task.
To open the task in the graphical Task Scheduler:
Start-Process taskschd.msc
Click directly on Task Scheduler Library in the left panel (not on one of its subfolders — the task lives at the root \, not inside GoogleSystem, Microsoft or any corporate subfolder). The centre panel lists all root-level tasks; find Docker-Weekly-Prune, right-click → Properties to edit the trigger or the command. The History tab shows every past execution and its exit code.
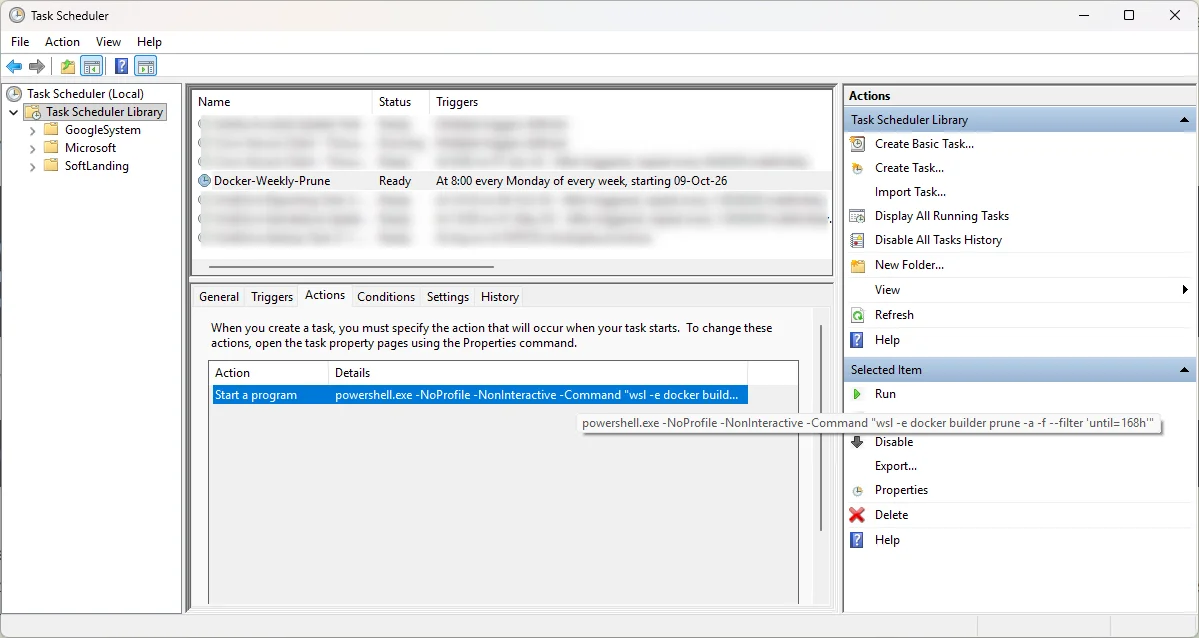
Side note: if the Task Scheduler UI feels like a relic from the Windows NT era — dense, modal, nothing where you expect it — that's because it essentially is. The PowerShell cmdlets above get the job done faster.
taskschd.msc blocked on your machine?
Some corporate Group Policy configurations restrict access to the Task Scheduler UI. That restriction applies to the MMC snap-in only — it does not affect the task itself, which will still run on schedule. Use the PowerShell cmdlets above to inspect and manage it instead.
To change the retention window from 7 days to, say, 14 days:
$action = New-ScheduledTaskAction `
    -Execute "powershell.exe" `
    -Argument '-NoProfile -NonInteractive -Command "wsl -e docker builder prune -a -f --filter ''until=336h''"'
Set-ScheduledTask -TaskName "Docker-Weekly-Prune" -Action $action
To remove the task entirely:
Unregister-ScheduledTask -TaskName "Docker-Weekly-Prune" -Confirm:$false
Prune does not compact — still check size periodically
The scheduled prune keeps the cache from accumulating, but it does not compact the .vhdx. With sparseVhd=true on a new sparse disk, the OS reclaims freed blocks automatically. Without sparse support on the existing disk, run a manual compact once every few months after any large prune.
Every Monday morning from now on, the task wakes up, connects to WSL, clears everything older than a week from the build cache, and exits — no manual action required.
Whether fstrim is still needed depends on one thing: run fsutil sparse queryflag "$env:LOCALAPPDATA\Docker\wsl\disk\docker_data.vhdx" in PowerShell.
This file is set as sparse— Windows returns freed blocks to the drive automatically.fstrimis never needed again.NOT set as sparse— the freed space stays inside the.vhdxbut Docker reuses it for future builds. The file does not grow further, Windows stops complaining, and that is a perfectly stable outcome. A manual compact (Steps 2–3 plus compaction) remains an option if you ever want to physically return those gigabytes to Windows, but it is no longer urgent.
If Something Goes Wrong
Wsl/Service/E_UNEXPECTED — the WSL service is stuck
This error surfaces when wsl --shutdown was called while Docker Desktop was still stopping. The fix is a full Windows reboot. No WSL command will help at this point. After the reboot, your distribution starts normally.
Verify your VHDX files after a reboot
Check that the VHDX files are intact before starting Docker Desktop again:
Get-ChildItem HKCU:\Software\Microsoft\Windows\CurrentVersion\Lxss |
  ForEach-Object { Get-ItemProperty $_.PSPath } |
  Select-Object DistributionName, BasePath
For Docker Desktop's data disk specifically:
Get-Item "C:\Users\your-name\AppData\Local\Docker\wsl\disk\docker_data.vhdx" |
  Select-Object Name, @{n='SizeGB';e={[math]::Round($_.Length/1GB,2)}}
A non-zero file size and a Docker Desktop that starts normally confirm nothing is corrupted.
Conclusion
Docker build cache accumulates silently and Windows never reclaims the space on its own. Three steps — prune, trim, shutdown — are the same for everyone. The compaction method then depends on a single question: do you have local admin? With admin, diskpart or Optimize-VHD compact the existing file in place. Without admin, Reset to factory defaults in Docker Desktop creates a fresh .vhdx — no IT rights needed for the reset itself, only for the one-time compaction if you want to avoid the data loss. Either way, sparseVhd=true and a scheduled weekly prune keep the problem from returning.
For a visual overview of what is accumulating before you decide what to prune, lazydocker shows every container, image and volume at a glance from a single terminal pane. The ZSH Docker functions I use daily — dex, dstop, dnuke — make the "what is safe to prune?" question trivial: dnuke does a full teardown including volumes for a project you are done with, in one command. And if the disk problem is deeper than cache — the WSL distribution itself needs to move to a larger drive — moving a WSL distribution to another location covers the export-import path.
Related posts


Windows Terminal - Adding a SSH profile
January 19, 2026

Windows Terminal - Split Panes
January 12, 2026

Use a background image in your Windows Terminal console
April 24, 2025

SSH - Autosuggestions with ZSH
February 13, 2025

Git - Some tips for your .gitconfig file
September 11, 2024