ZSH Functions - Customizing Your Shell for Docker Management
A collection of ZSH functions to enhance your terminal experience, including interactive Docker container management with fzf. Start new sessions, stop containers, and more with ease.

This article is part of the Customize your shell with ZSH series:
- Customize your Linux prompt with Powerlevel10k
- How to install Oh-My-ZSH
- Autosuggestions in the console using ZSH
- Syntax highlighting in the console using ZSH
- Linux - Working with the history of your last fired actions
- ZSH Functions - Customizing Your Shell for Docker Management
- Beyond the Monolith - Organizing Your ZSH Workflow Like a Pro
Changelog

Enhance your terminal workflow with custom ZSH functions for interactive Docker management. This article presents tools like dex, dstop, and dnuke that utilize fzf to let you quickly access shells, stop containers, view logs, and clean up resources without memorizing commands.
On a daily basis, I use a few ZSH functions that I find useful. These functions can be added to your ~/.zshrc file (or, better, to their own file — see Beyond the Monolith - Organizing Your ZSH Workflow Like a Pro) to enhance your terminal experience while working with Docker. They provide quick and interactive ways to manage your Docker containers without having to remember specific commands or container IDs (and let's be honest, it's easy to forget them!).
In this article, I'll share some of the ZSH functions I use for Docker management, including how to start a new terminal session in a running container, stop containers, access logs (even if the container is stopped), and clean up unused resources. These functions leverage fzf for an interactive selection process, making it easier to manage your Docker environment directly from your terminal.
Because these functions rely on fzf, if you don't have fzf installed, you can install it using your package manager (e.g., sudo apt-get install fzf on Debian-based systems). New to it? Check out Introduction to fzf - Fuzzy Finder first.
Start a new terminal session in a running Docker container
Imagine you want to quickly access a running Docker container without having to remember its name or ID. The dex function allows you to do just that. It lists all running containers and lets you select one to start a new terminal session inside it.
So, by simply running dex in your terminal, you can easily access any of your running Docker containers. This is especially useful when you have multiple containers running and want to quickly jump into one of them without having to look up its name or ID.
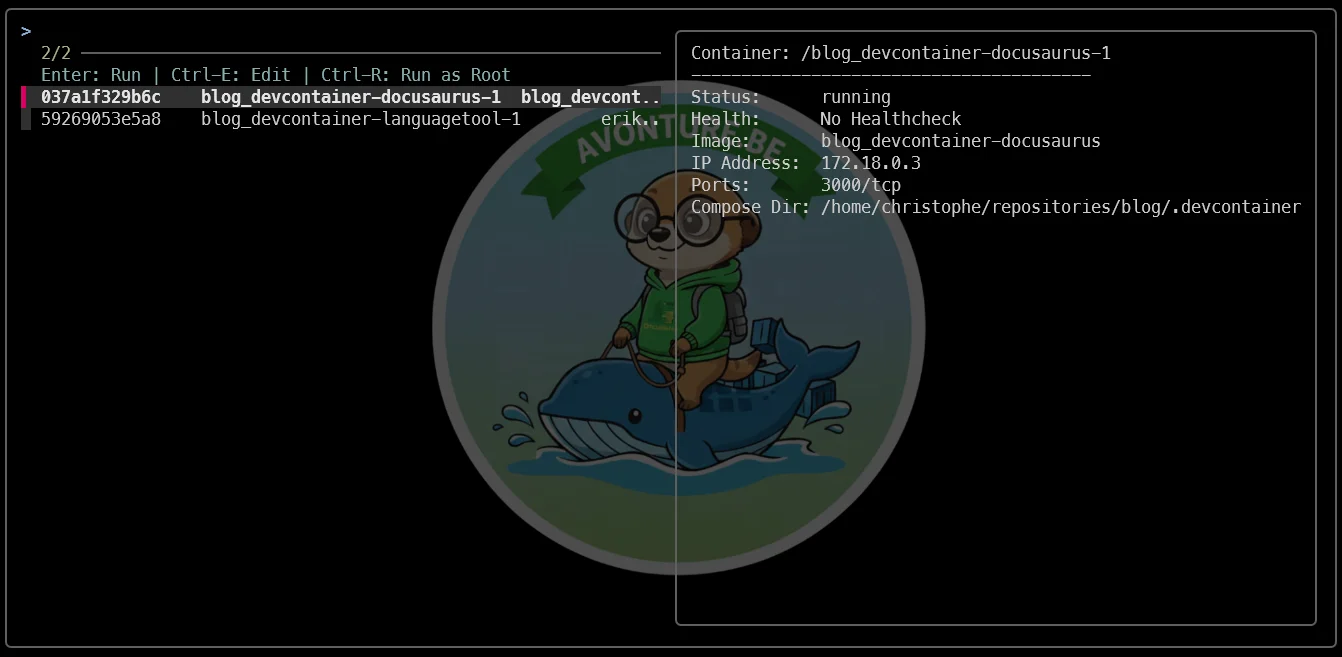
Editing the command before running it
Press Enter to select the container and start the session, or press Ctrl+E to get the command in your prompt for editing — useful if you want to modify it before running it, for example to disable the entrypoint or mount a volume.
Root access
Press Ctrl+R while selecting a container with dex to start the session with root access. This is useful when you need to perform administrative tasks inside the container that require elevated privileges.
Filtering
Run dex any_pattern to filter the list of containers to the ones with that pattern.
Stop one or more running Docker containers
dstop is another useful function that allows you to stop one or more running Docker containers. Similar to dex, it uses fzf to provide an interactive interface for selecting the containers you want to stop. You can select multiple containers by using the multi-select feature of fzf i.e. pressing Tab to select multiple containers before pressing Enter to stop them.
Press CTRL+A to select all containers at once.
In the right pane, you can see information about the selected container(s) such as the container name, image, status, and ports. This can help you make informed decisions about which containers to stop. You can also see the live resource usage of the selected container(s) (CPU, memory, network I/O, block I/O) to identify which containers are consuming the most resources before deciding to stop them.
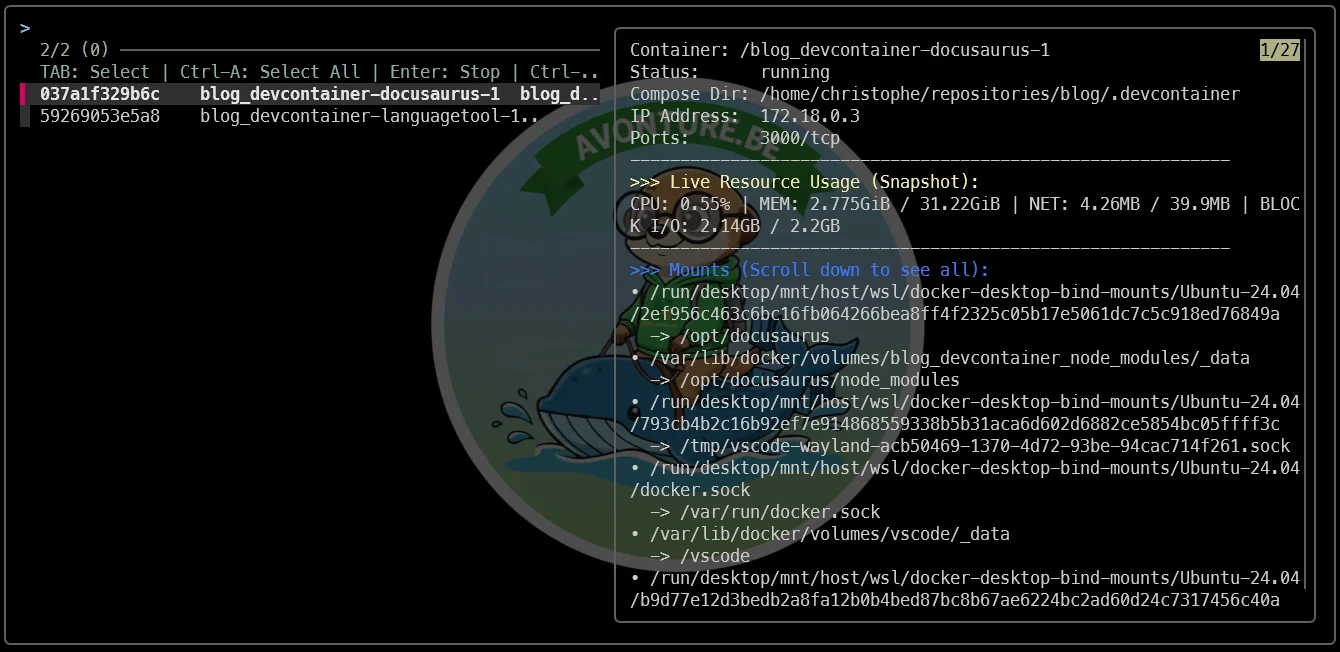
Access logs of a running Docker container
The dlogs function allows you to access the logs of a running Docker container. It also uses fzf to provide an interactive interface for selecting the container whose logs you want to view.
In the right pane, you can see the logs of the selected container in real-time. This is particularly useful for debugging purposes, as you can monitor the logs as they are generated. You can use the scroll button of your mouse to scroll through the logs.
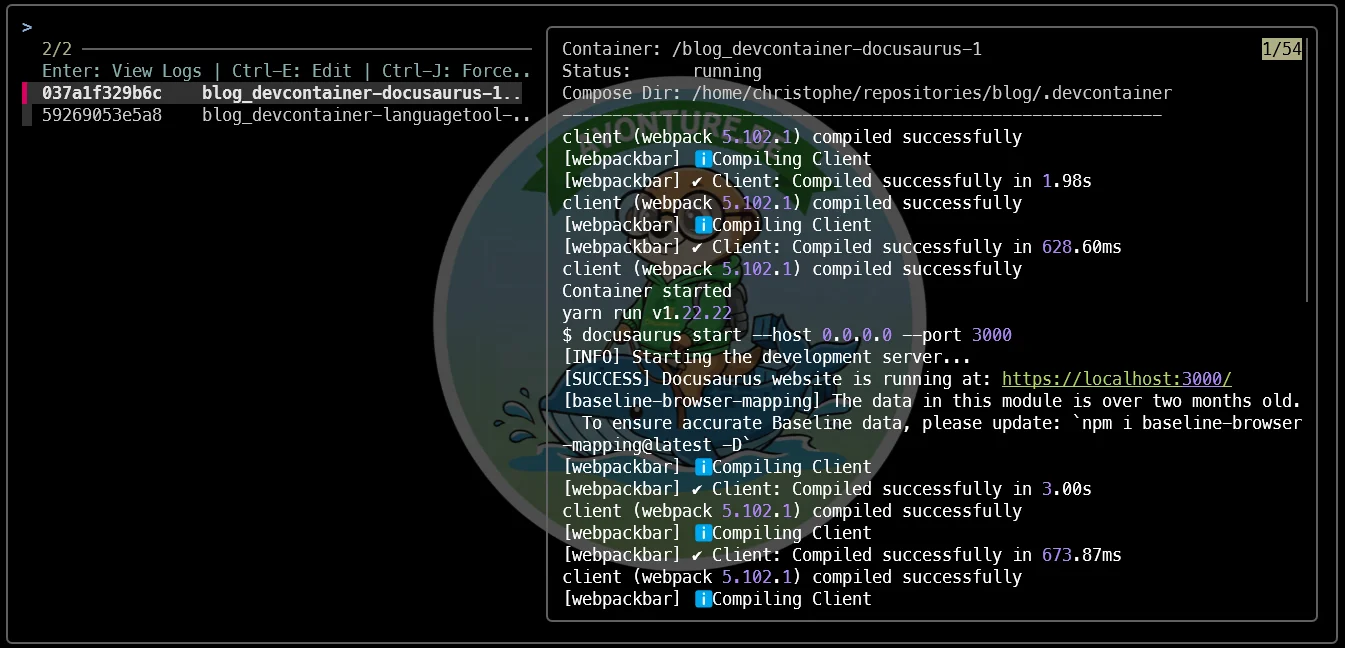
Clean up unused Docker containers, images, volumes, and networks
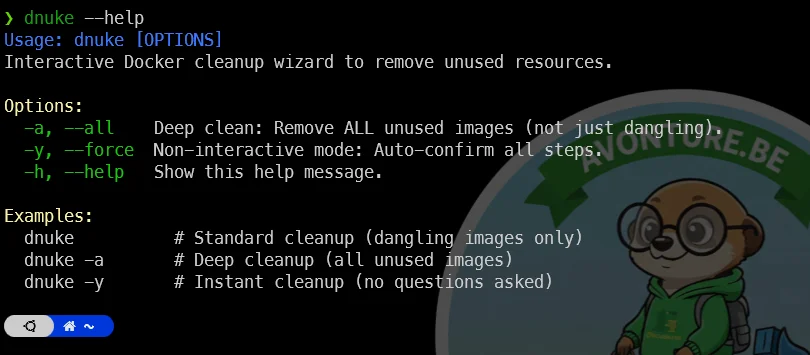
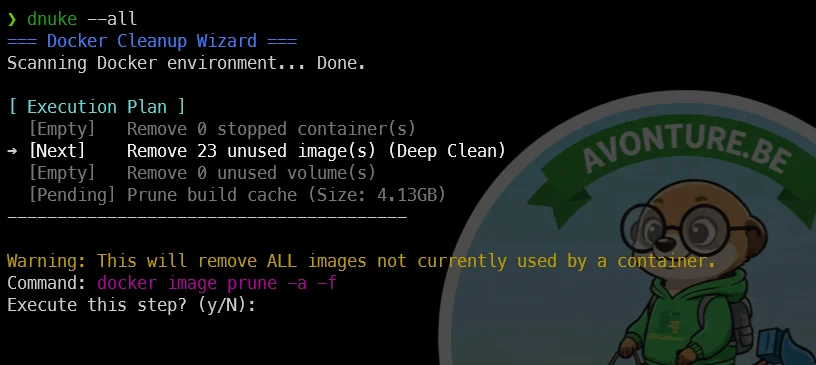
The dnuke function acts as an intelligent, interactive Docker Cleanup Wizard designed to reclaim disk space without the risk of blindly deleting resources. Unlike a standard docker system prune, dnuke first scans your environment and presents a dynamic Execution Plan, showing you exactly what can be cleaned up (stopped containers, dangling images, unused volumes, and build cache).
It processes cleanup in granular steps, allowing you to skip specific categories if needed. By default, it operates in a "safe" mode, targeting only dangling (untagged) images.
dnuke supports CLI flags to customize its behavior:
dnuke flags
- Deep Clean —
dnuke -a(or--all) removes all unused images, not just dangling ones (similar todocker image prune -a). - Non-Interactive —
dnuke -y(or--force) bypasses the wizard and automatically confirms all steps. - Help —
dnuke --helpshows the full list of options and usage examples.
If the environment is already clean, the wizard detects it immediately and exits without asking unnecessary questions.
Creating a new container
The last function is drun to get the list of existing images and create a new container based on the selected one.
Filtering
Run drun any_pattern to filter the list of images to the ones with that pattern.
One to rule them all
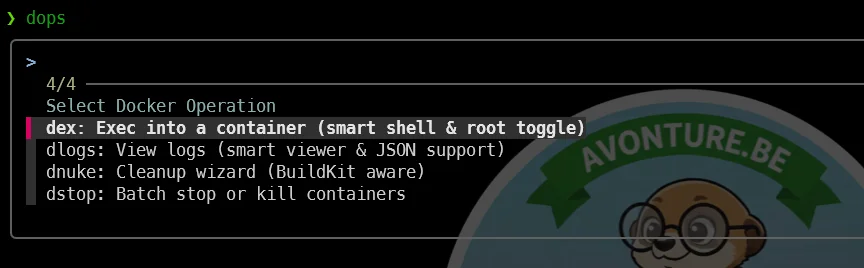
The dops function is a wrapper around the other functions. It allows you to quickly access the other functions by using a single command. Simply run dops in your terminal, and it will list all the available functions. You can then select the function you want to use, and it will execute the corresponding command.
Now, edit your ~/.zshrc file and add the following line to source the docker.zsh file: [[ -f ~/.zsh/docker.zsh ]] && source ~/.zsh/docker.zsh. This will make the functions available in your terminal.
When you don't know which container yet
dex, dstop and dlogs all assume you already know which container you want. For the moments you don't — five containers just started and you need to see CPU, memory and logs side by side to figure out which one is the problem — a dashboard beats a menu. That's the job of lazydocker, run as a container.
How to install
Edit your ~/.zshrc file and add the following lines at the end of the file:
fpath=(~/.zsh/docker-fns $fpath)

autoload -Uz _d_check_env _d_print_cmd _d_has_running_containers
autoload -Uz dex dlogs dnuke dops drun dstop

# Setup alias for the interactive menu
alias d='dops'

# Print quick reference menu only in interactive sessions to avoid breaking scripts
if [[ -o interactive ]]; then
    echo -e "\033[1;30mDocker Utils loaded:\033[0m"
    echo -e "  \033[0;36mdex\033[0m   (exec/root) \033[0;36mdlogs\033[0m (logs/json)    \033[0;36mdstop\033[0m (stop/kill)"
    echo -e "  \033[0;36mdnuke\033[0m (clean)     \033[0;36mdops\033[0m  (menu/alias \033[1;32md\033[0m) \033[0;36mdrun\033[0m  (create new container)"
fi
Now, create the ~/.zsh/docker-fns directory and move the individual function files (dex, dlogs, dnuke, dops, drun, dstop) into that directory. This way, you can keep your functions organized and easily maintainable — the same fpath/autoload pattern is explained in more detail in Beyond the Monolith - Organizing Your ZSH Workflow Like a Pro.
Need help here? Click the "Help" button above for setup instructions.
This article is part of the Customize your shell with ZSH series:
- Customize your Linux prompt with Powerlevel10k
- How to install Oh-My-ZSH
- Autosuggestions in the console using ZSH
- Syntax highlighting in the console using ZSH
- Linux - Working with the history of your last fired actions
- ZSH Functions - Customizing Your Shell for Docker Management
- Beyond the Monolith - Organizing Your ZSH Workflow Like a Pro
Loading comments…
Related posts

ai-explain: ELI5 for Scripts and Errors, Right in Your Terminal
November 12, 2026

ai-data: Let a Local LLM Write Your jq and awk One-Liners
October 22, 2026